
Digital Fog in 3 steps
While I strongly prefer real deal (read here on creating fog in studio, including working with dry ice)… sometimes there is a need for digital one, done in Photoshop. Easy 3 steps, no kidding.
You’ll need an image of a cloudy sky. IPhone snap will do just fine.
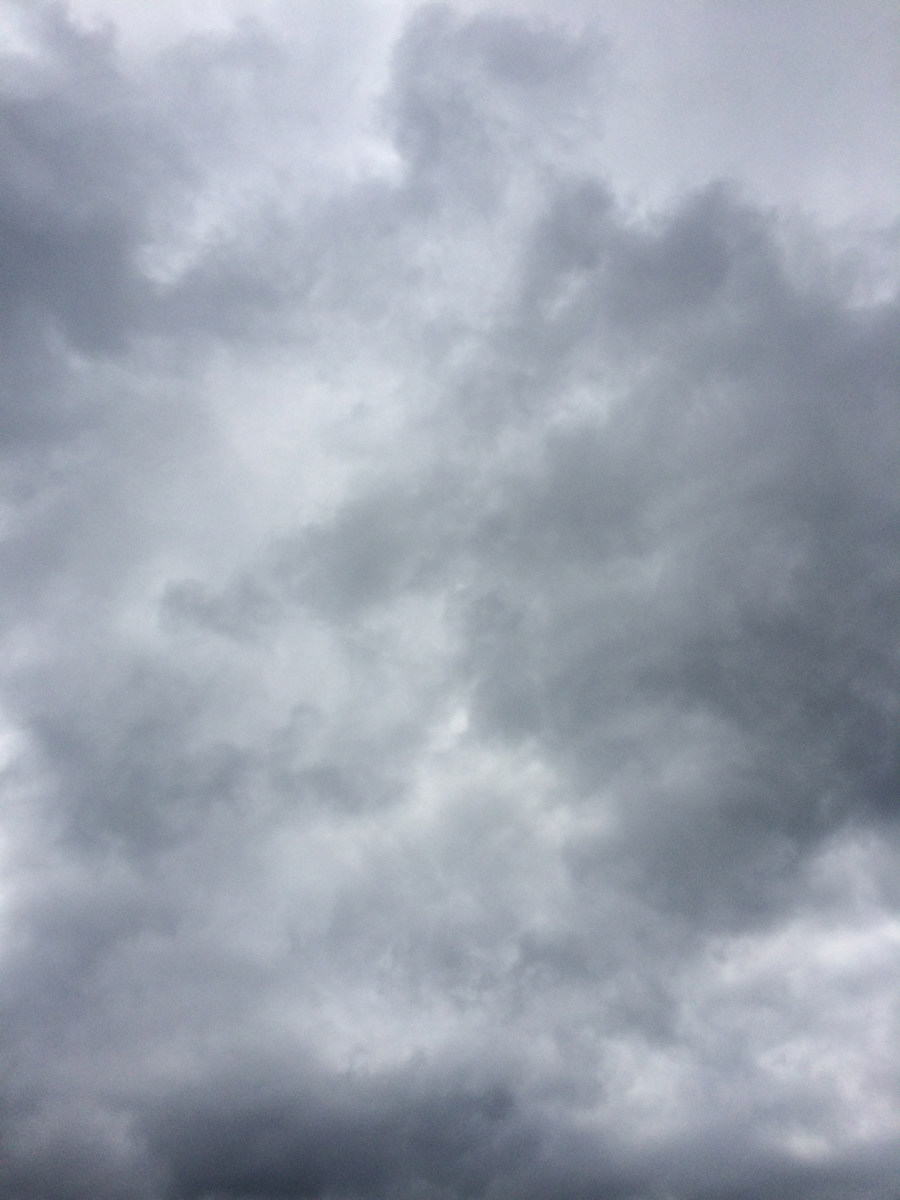
1. Drag and drop cloud image. Change layer mode to “Screen”.

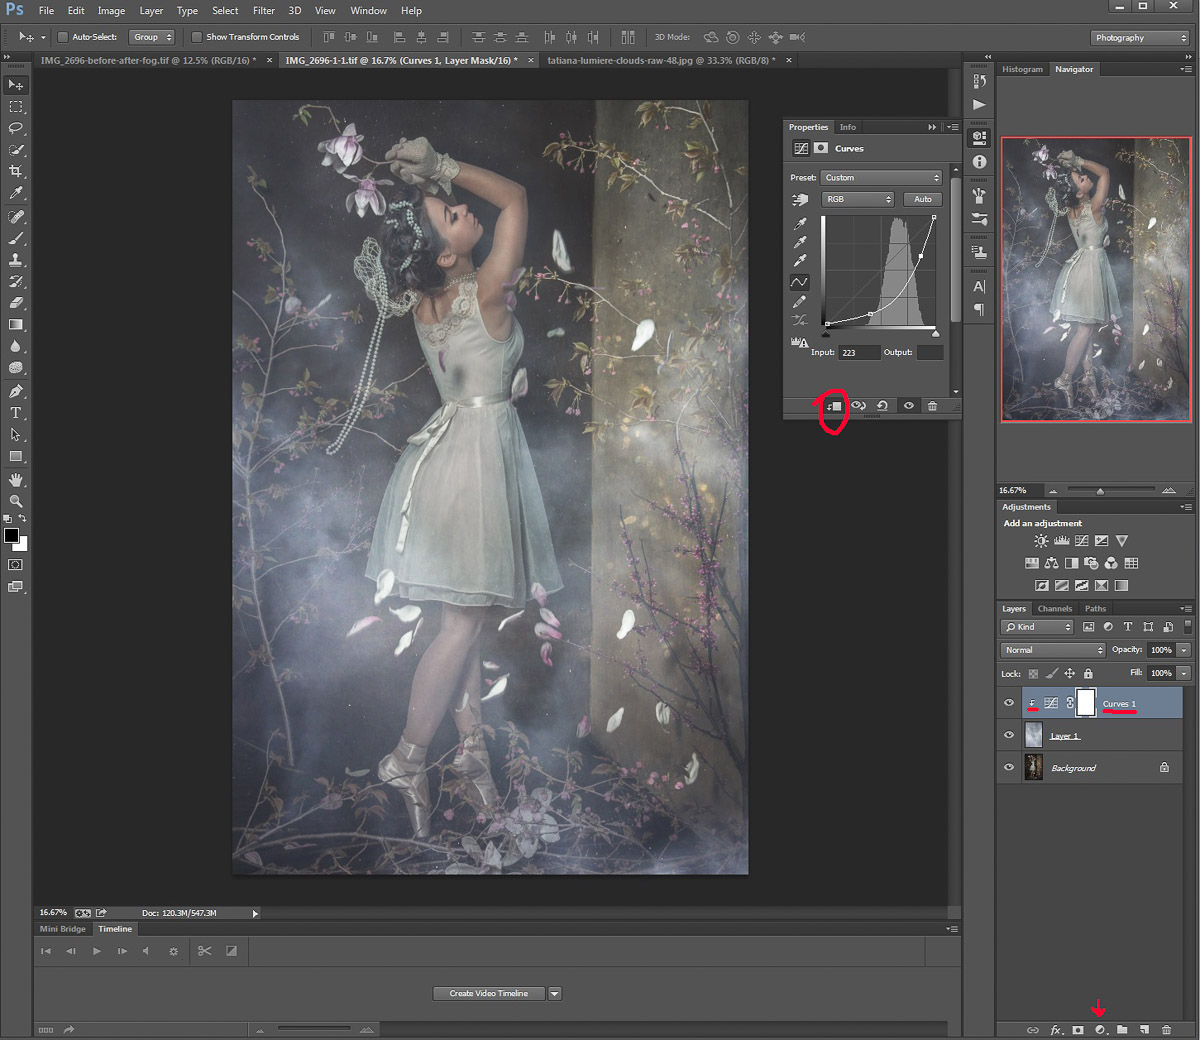
2. Add curves. (click where the arrow points, then click on “Curves”. Don’t forget to clip to layer by clicking on the very bottom left button in curves’ dialog window.)
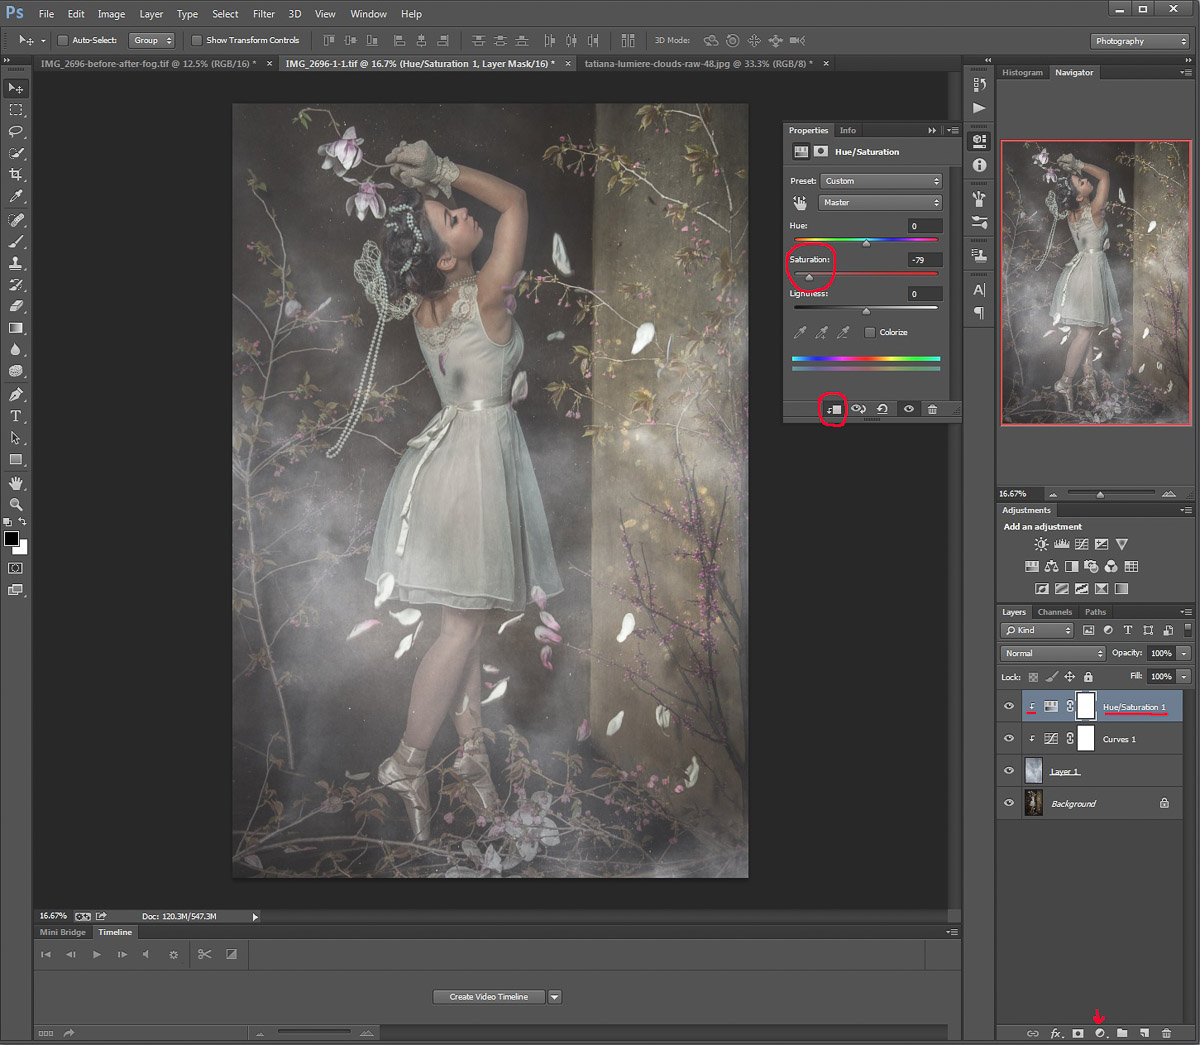
3. Desaturate if you want to.
Voila.

I’d recommend to add digital fog as the very last step of the editing. Want actions to help with it? Click here.
Questions? Shoot.
1 Response Comment