Shooting with Fog
Goal of this article is simple – to share my journey. All opinions shared here are just that – my opinions.
In the images used as examples no added fog textures were used (unless noted).
Basically if you see fog, that is how it was. (minus color work, duh ;).
For one-on-one mentoring on how to work with fog/dry ice email me at tatiana@tatianalumiere.com
Fog machine
I’ve been fascinated with use of fog in photography for some time.
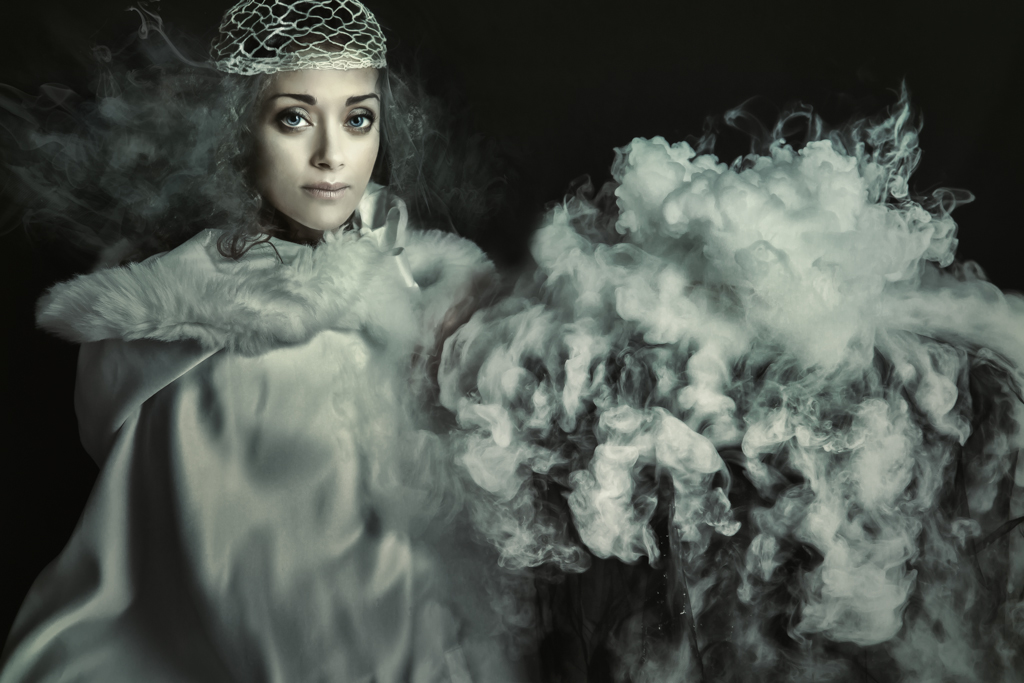
Last year I’ve experimented with fog machine that uses liquid fog,
with some interesting, yet not very easily controllable results.
Fog machine produces fog that rises, so it looks more like smoke, and not fog.
Next step for me was to chill the fog produced by the machine. It was done by attaching cooler with ice,
so the fog had to go through the cooler prior to its appearance.
Some un-chilled fog was escaping though the walls of the fog machine itself, so the result was twofold, as you see in this image.
Dry ice
This year I’ve started experimenting with dry ice. Typically I’ll get 5 lbs, and majority of times half of it is left unused. It’s very affordable: I’m getting my 5 lbs for less than $8 from a local vendor.
Safety:
Safety was one of the concerns of mine, so I’ve researched the subject for some time prior to exposing myself ( both as a photographer and a model), and other people to it. I hope safety is your concern as well, and as a responsible adult you’ll do your home work. And please, please make sure anyone in your studio who comes into contact with dry ice knows what they are dealing with.
I’ll touch on 2 aspects of safety: exposure and handling.
-Exposure:
Dry ice is a solid, frozen carbon dioxide, the same gas that we exhale. Ever been in a stuffy room for some time? Then you’ve experienced some of the effects of CO2 concentration: headaches, difficulty breathing, nausea. Too much carbon dioxide gas can cause asphyxiation and even death. By the way, drinking too much water can cause hyponatremia and even death. So again, be adult and do your homework. To help you – here are some resources:
-Handling:
If you’ll touch it with bare skin, you’ll get burned. So gloves are a must, never direct contact. That’s all for handling.
How I use this information?
-make sure studio has fresh air prior to the use of dry ice.
-my lights are prepared, pose and angle is rehearsed by taking few shots without dry ice. That helps to make exposure to the fog as short as possible.
-when near the fog, it is NOT the time to exercise the lungs and take full breaths.
-and I would not expose to the fog pets, children, elderly, or anyone who has history of asthma (or any other lungs diseases).
Now the fun part – actual use of dry ice:
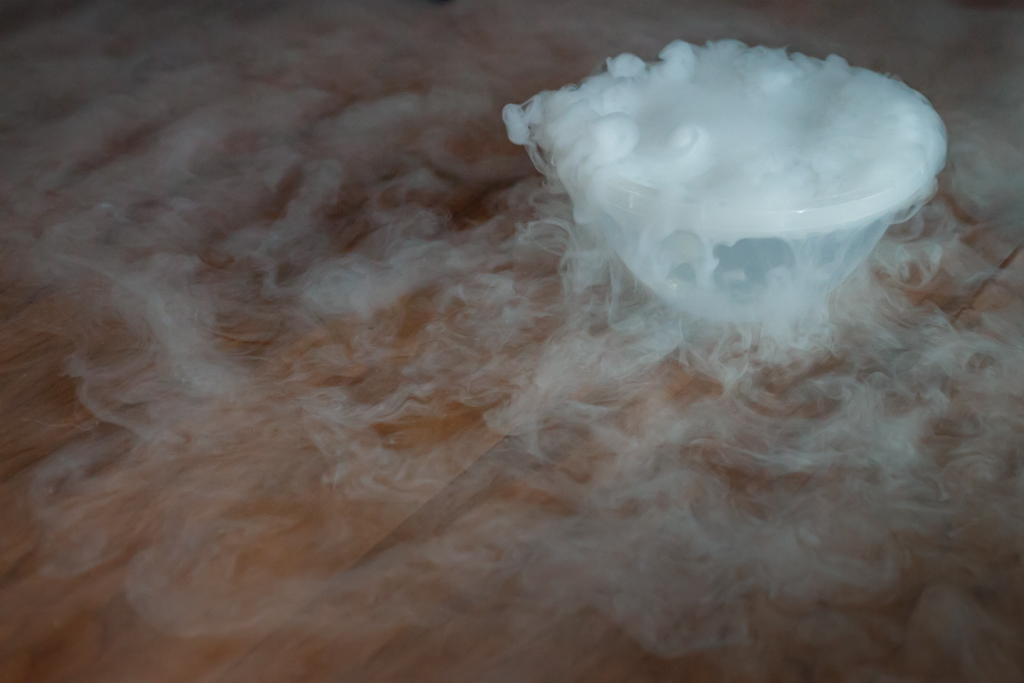
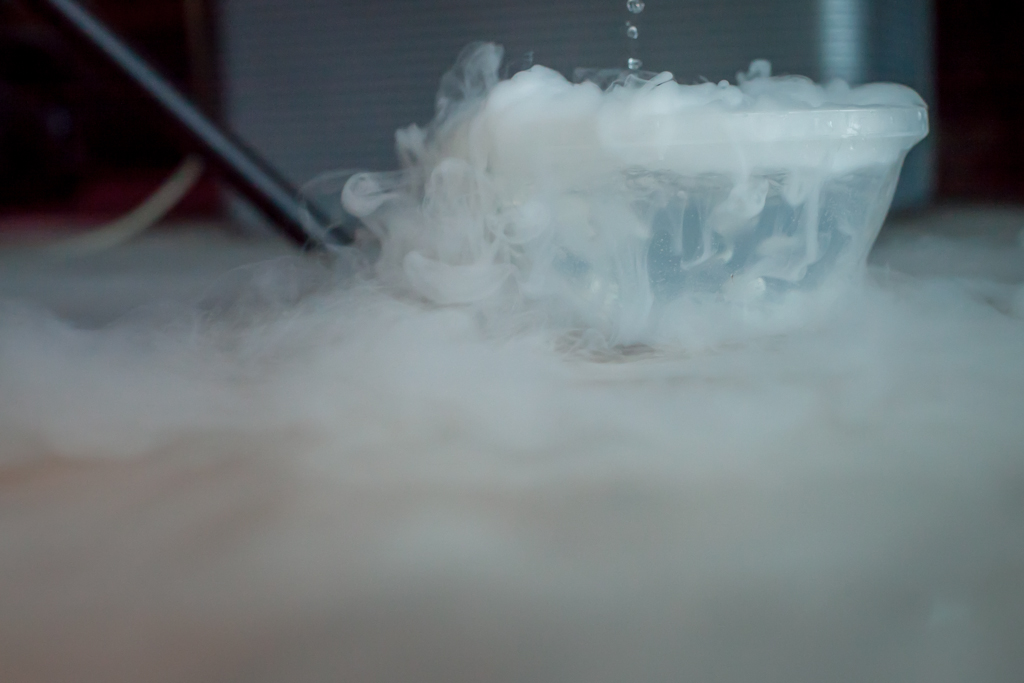
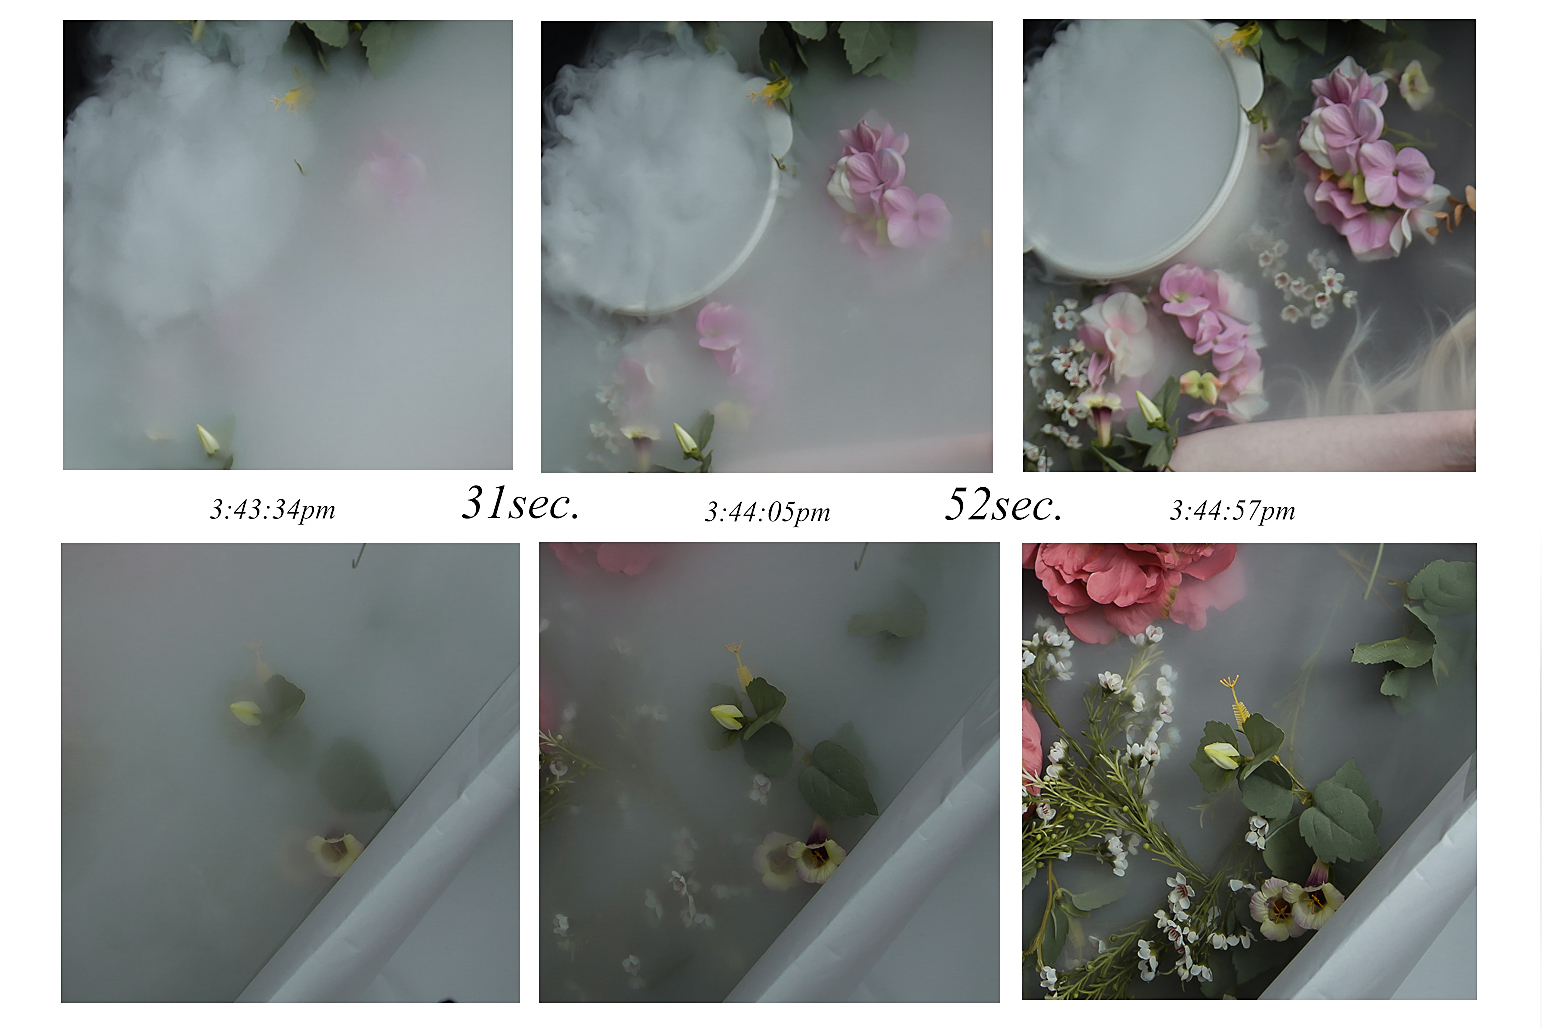
Fog produced by putting dry ice in a hot water. The hotter the water, the more fog you’ll get. More water and less dry ice is better than otherwise. That’s how it looks:
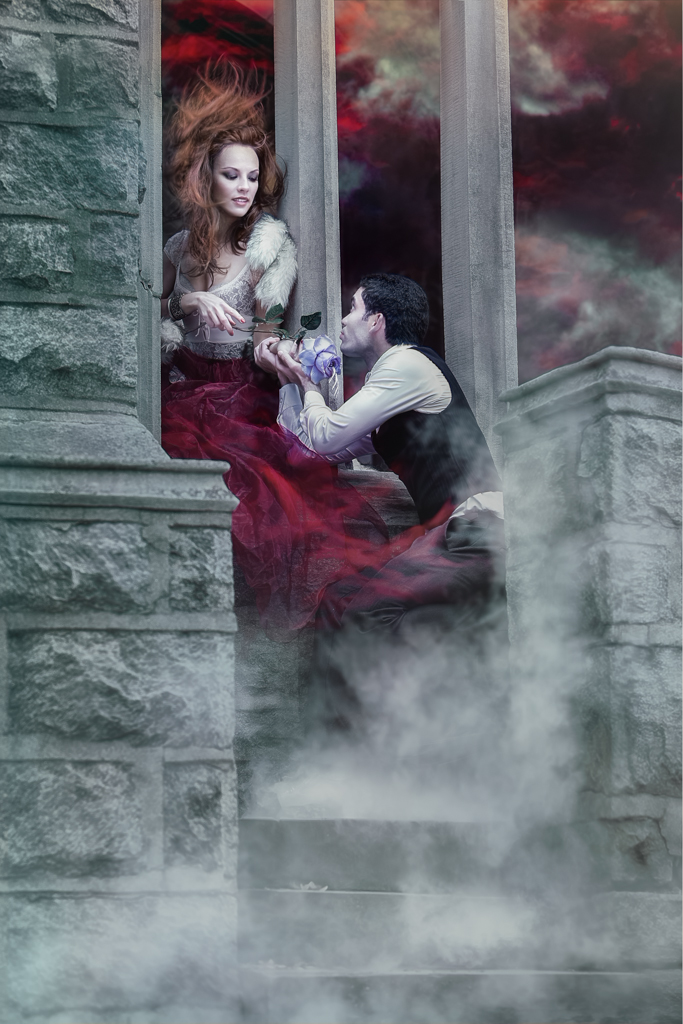
Cold goes down, warm gets up. My first use of dry ice was outside, with the temperature below freezing. I was getting smoke effect, like on the stairs in this image:
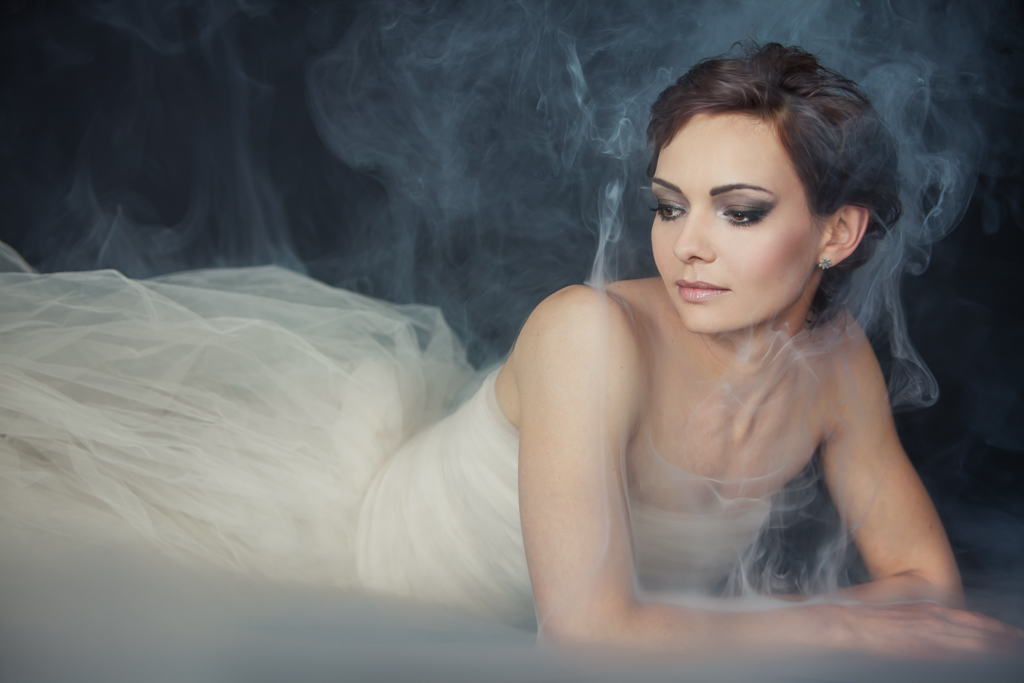
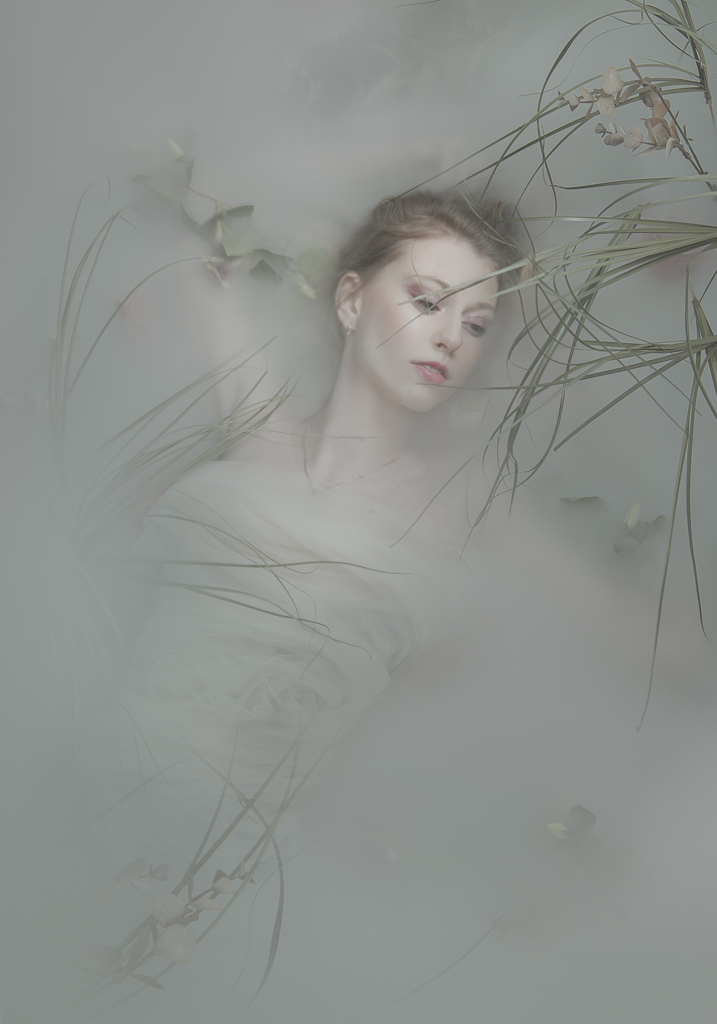
When used in warm environment, fog goes down and accumulates. It spreads quickly to a very thin layer.
As I wanted to emulate effect that gives added milk to water in studio (on use of water in photography I wrote last year here) my assistant and I, with help of our model, built paper walls that provided encasement for the fog, to allow some accumulation. We’ve been using 2 bowls left and right of the models for these shots, allowing the fog dissipate around the models on its own – no fanning business 😉
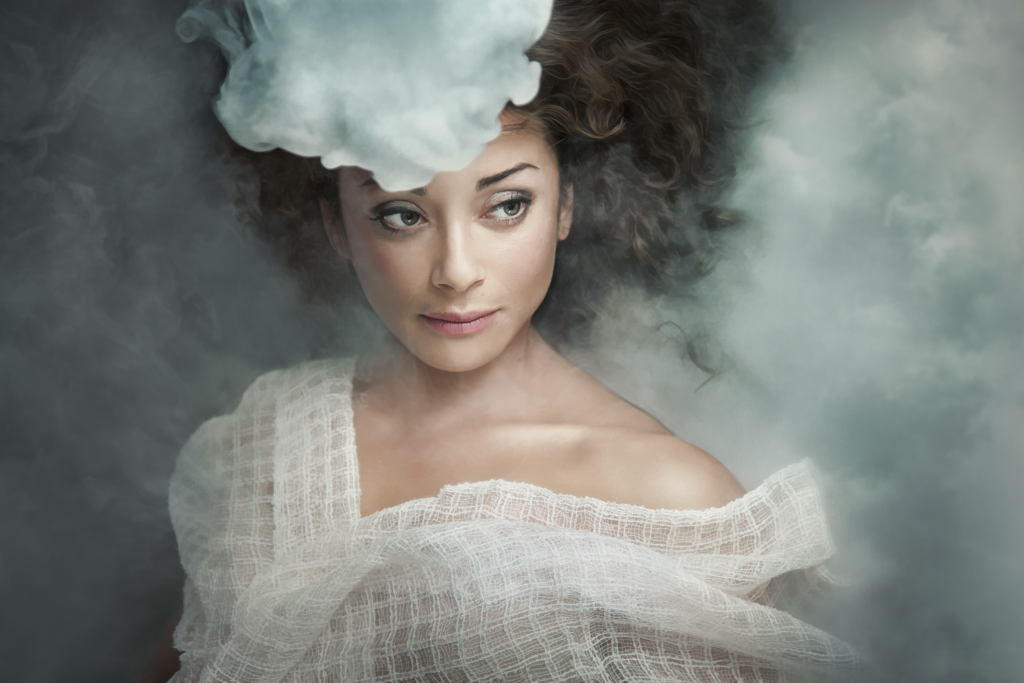
although this one looks as if the model was sitting, in reality she was laying on her back, the “hat” is just a puff of a cloud from one of the bowls.

The fog dissipates very quickly, as you can see here:
While the fog goes down, it gives different picture. For this work bowl with hot water was on a table, and model was sitting below the table top.
Few more things worth mentioning:
While it’s possible to work dry ice on your own (and in my first studio trials it was just me, preparing fog, photographing and modeling), but… way easier with an assistant, and that way you’re not losing precious seconds.
From reports from models and clients I worked with, and my own observations: people experience fog from pleasantly cool to cold. I usually use half of my 5 lbs bag, doing 3-4 sets during the shoot. Each set lasts no longer than couple of minutes, so be prepared.
Questions? Shoot.
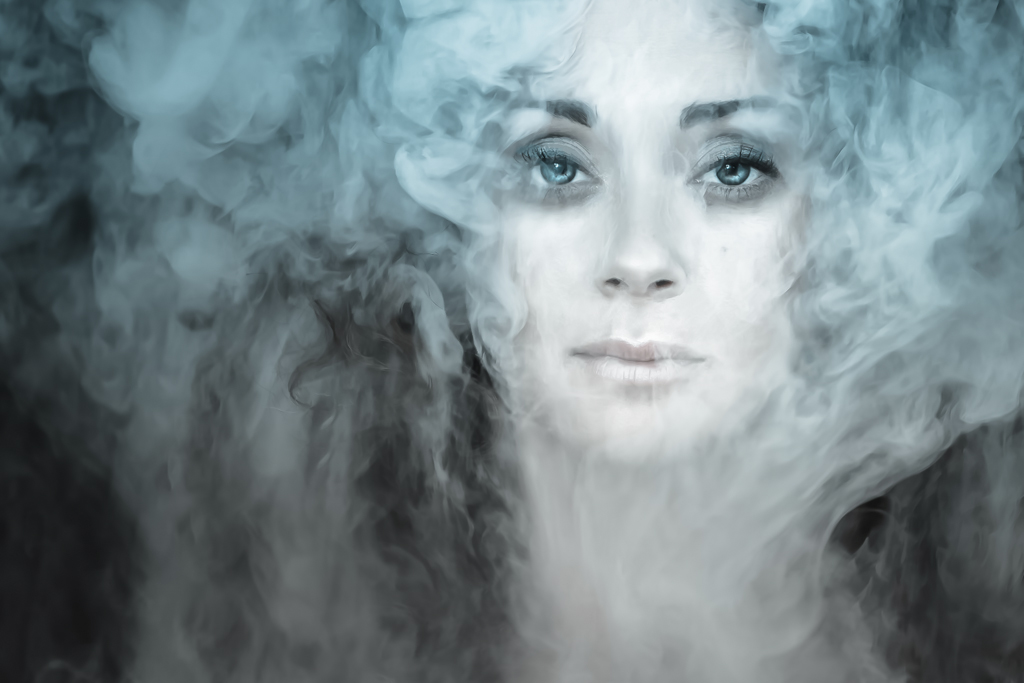
*hair fog done in Photoshop.
Thank you so much for sharing this! I am just learning to shoot studio images this week. I am now so inspired!
We are doing a shot a day with a theme and a one light set up for all of February. I have to come up with a “soft light” image, theme “sleep/insomnia” tonight. Now I have an idea.
I was so curious how you did the image with the table top but I was too shy to ask.
Thanks again!
Janelle
Janelle, thank you so much for sharing your journey! Admire that you do 365 challenge with a twist of one light set up for a month. Did 52 last year… so I have tiny taste of what it’s like to be on a schedule. Any questions – ask, no hesitations. I’ll answer to the best of my abilities.
Do you use strobes when capturing these types of images. Also how do you retouch the face without altering the smoke look. I tried something similar and that was the problem that I ran into.
Catherine, I use mixed light (window and strobes). In post I usually use frequency separation for retouch, and don’t use instruments to increase contrast.
Tatiana!! This is so cooL! SO very helpful and completely inspiring. Now I MUST try some work with dry ice!!! 😀
Robert thank you! Let me know how it goes, teach me what you’ll learn! I’m sure you’ll take it to the next level 😉
It’s actually a great and helpful piece of information. I’m happy that you simply shared
this helpful information with us. Please keep us up to date like this.
Thanks for sharing.
Caroline my dear friend, thank you for sharing!