Have you synced your Camera Profile to your Lightroom Imports?
This post is for photographers. If you said “Yes” to the name of the post, there is nothing new for you here. If your answer is “NO”, stay with me, I’ll rock your world.
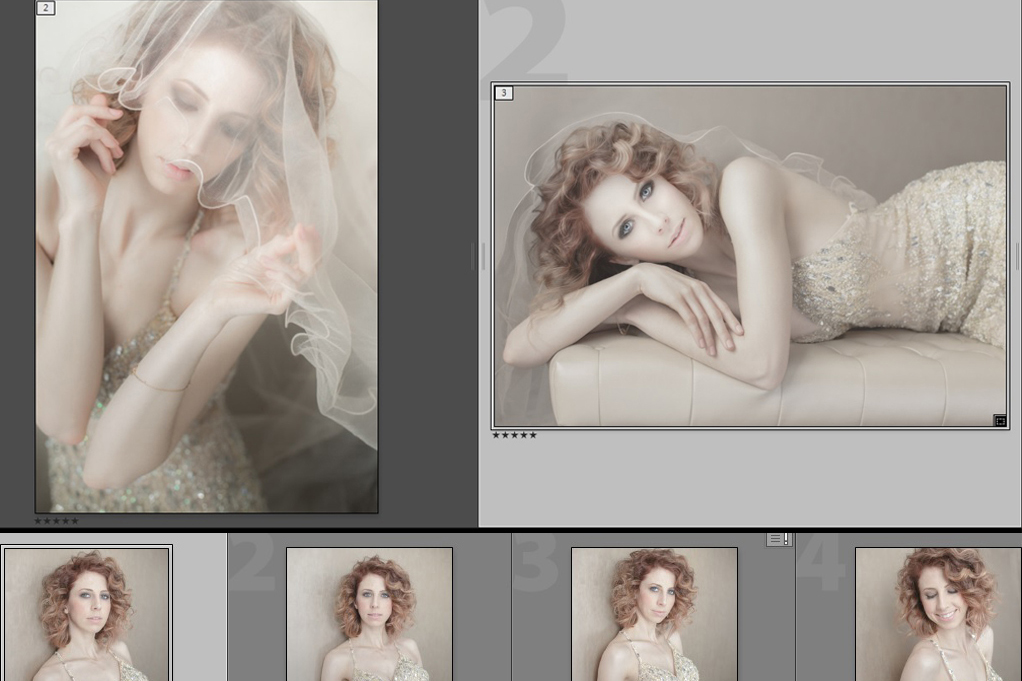
If you photograph people, you know how much encouraging it is to show stunning image on the back of your camera, right? Here is where your set Camera Profile plays big role. I”m Canon girl. Canon has Standard, Portrait, Neutral, Landscape, Monochrome etc. Nikon has very similar ones with slight name differences.
Sue Bryce gave me great advice once – switch to “Neutral”. For showing portrait on the back of the camera it is the best, most flattering one. Now, if you are shooting RAW (and I hope you do), you know that these Profiles do not affect your RAW files. These are for your JPEG previews – what you see on your camera screen. When you import your RAW files into Lightroom / Camera RAW, the embedded JPEG file is discarded and a new one is generated, based on default settings, or a chosen import preset.
I use Lightroom. I want to see what I saw on the back of my camera as for me it is a good starting point. For that 3 simple steps are needed:
…a tip – make sure that an image that is selected is RAW (not TIFF JPEG etc)
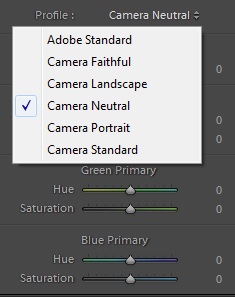
- In DEVELOP module look bottom right. Find “Camera Calibration”. Open “Profile” dialog window, choose “Neutral”.
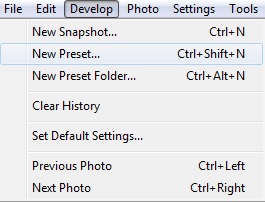
2. Look top left, develop new Preset. Tick off what you want this preset to have, in particular don’t forget “Process Version” and “Calibration”.
3. Go to LIBRARY module, click on “IMPORT”. Look top right. In the “Develop Settings” put the Preset you had developed.

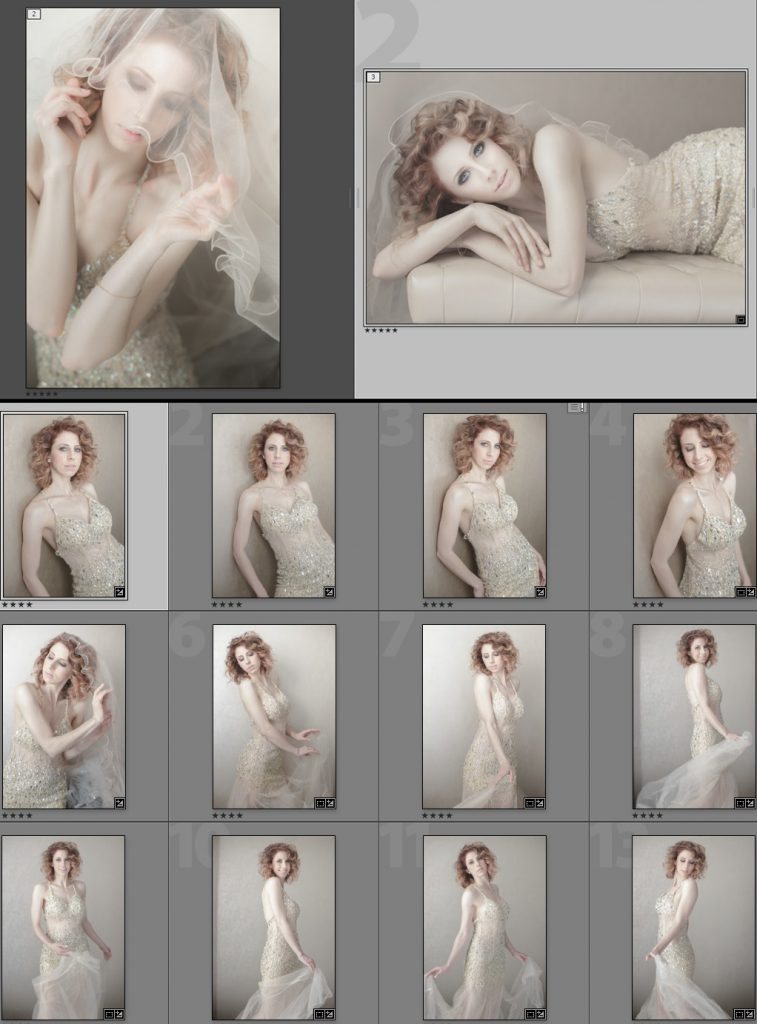
Done. Enjoy. I do. I did this with the session I shared in my previous post. It gave me great starting visual point. Top 2 are edited, the rest are not. As you can see, unedited ones are very close to the final result.
I have tried this before but found it difficult to get color back into the image. Do you use a preset to adjust after that. Fabulous images by the way.
Tatiana, thank you so much for this blog post! I’m downloading a shoot as I type this and what a difference I can see it’s already making! The pictures look just like they did on the back of the camera! My client and I were able to view which outfits looked best with particular backgrounds for her headshots.
Thanks again! I always learn so much from Sue and all of the wonderful mentors!
Peace & Blessings,
Julie 🙂
Wow Tatiana! I can’t believe what a difference this makes to the look of my images in LR. They are so much softer and the skin so much more flattering this way. I look forward to handling my RAW files for portrait this way from now on. From the bottom of my heart, thank you so much for sharing this. A game changer for sure!