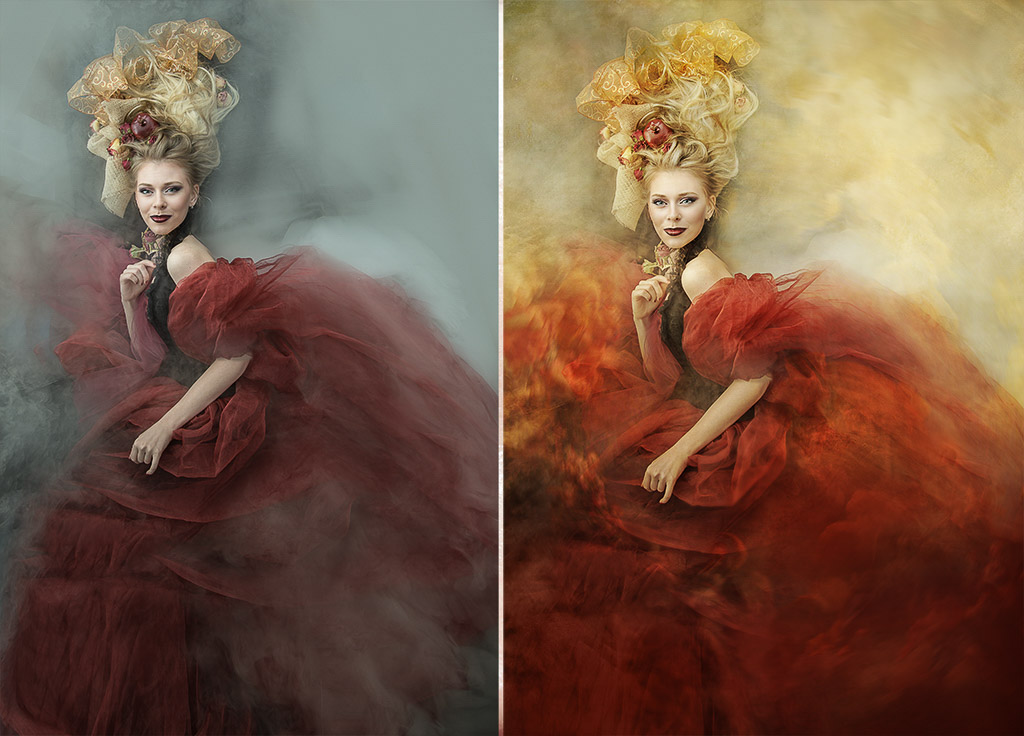
Working with textures: B&W and COLOR
Honestly I tried to make a video tutorial – there went my Saturday. Camtasia failed me. While I’m in search of a perfect, or at least working, screen capture studio, here is a snapshot tutorial on how to work with textures.
This is one of the recent portraits I shot. Thank you for overwhelmingly warm feedback! And for your questions!
( Please continue asking! I’m happy to share my way of working.)
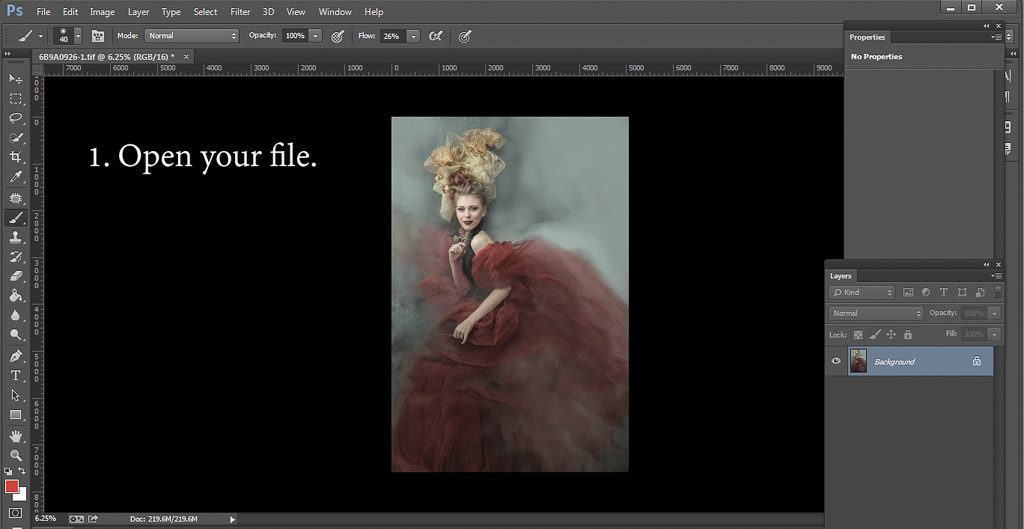
I did not do screen captures when I edited it originally. As you can see we are starting with image that still needs some work.
Normally I’d first do Frequency Separation editing face/body/hair. (Have you seen my actions yet?)
Today we are bypassing this step playing with textures only.
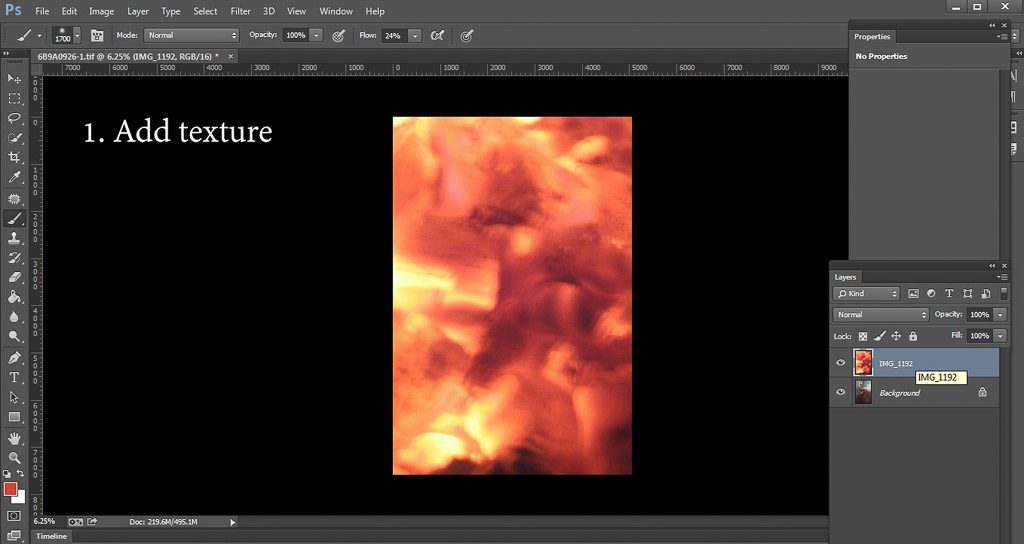
Let’s start with Black and White.
…love to shoot with fog! It’s magical!
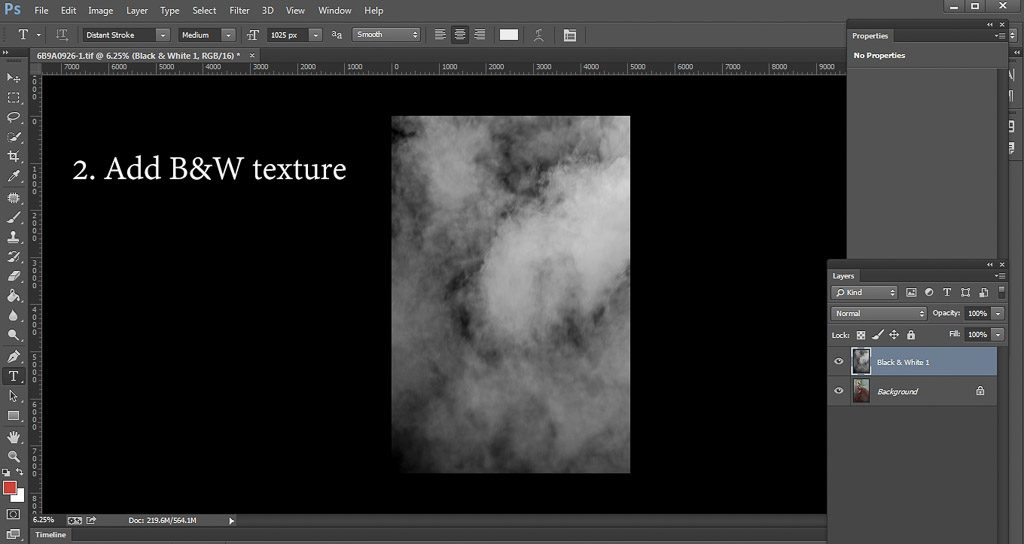
…this is an image of a smoke from a fireworks in our back yard. Love shooting my own textures! Do you have your collection?
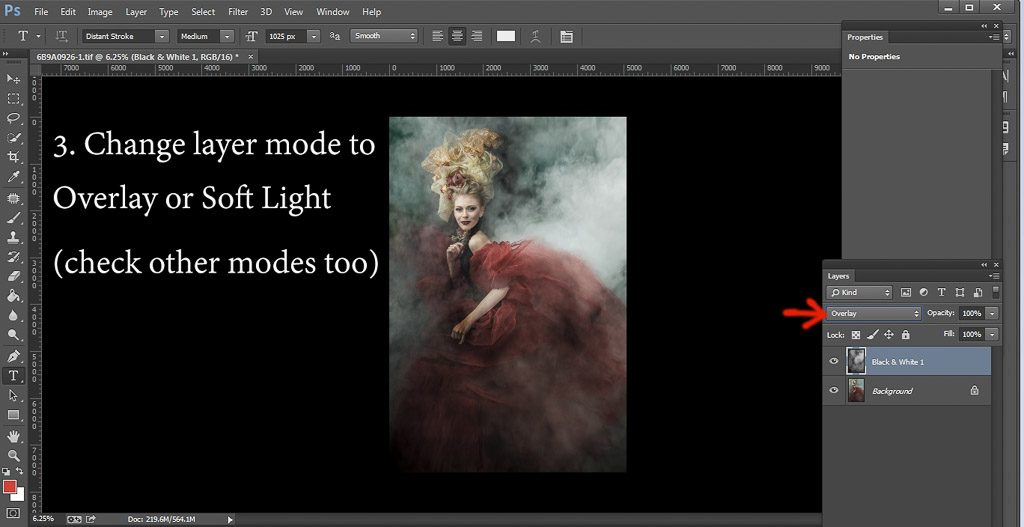
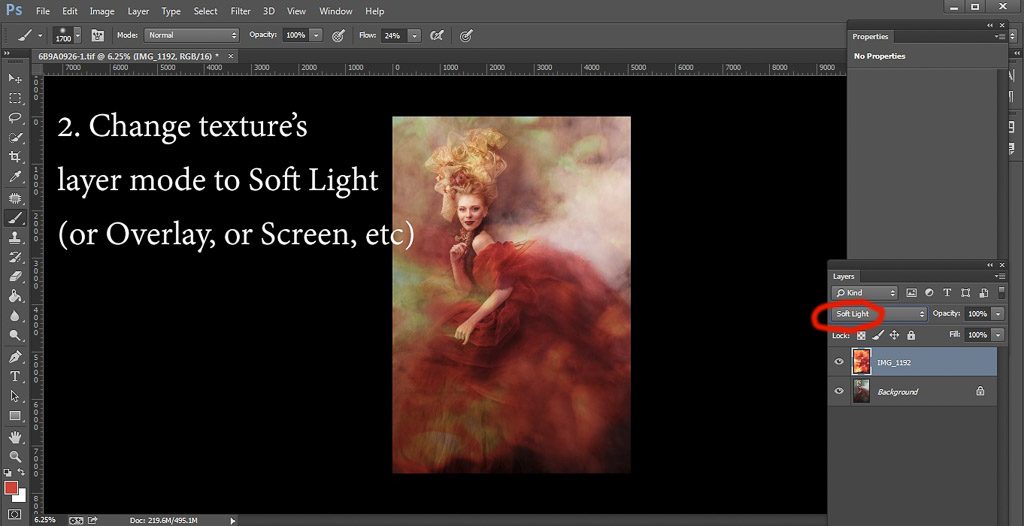
…my go to are Soft Light, Overlay, and sometimes Screen. Here we have issue of uneven texture on her hands and face.
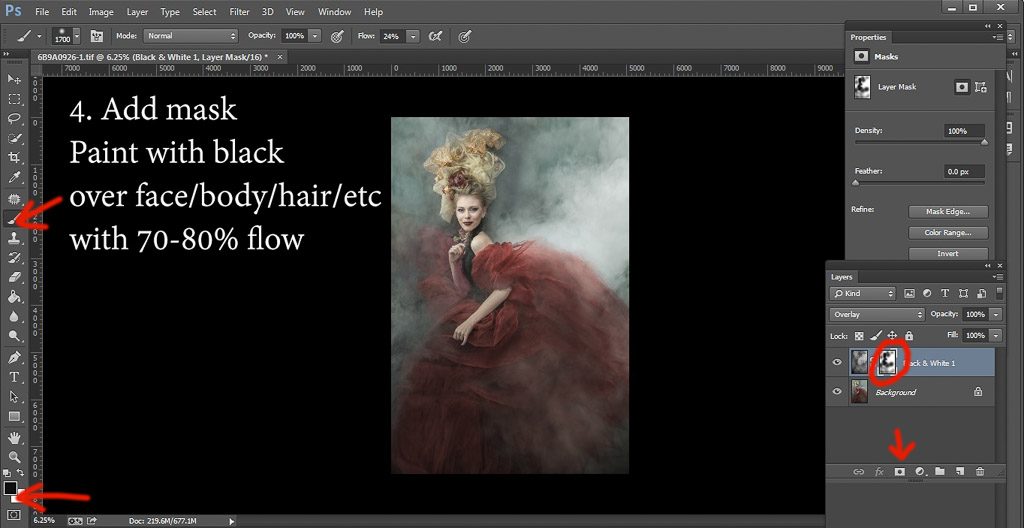
Mask the offending texture. Use lower flow (20-30%) if you want to soften the texture in other areas.
And now – textures in COLOR
…by the way, all of my textures are saved with color being preserved. Very useful. This one was shot with my Iphone – fire in the fireplace.
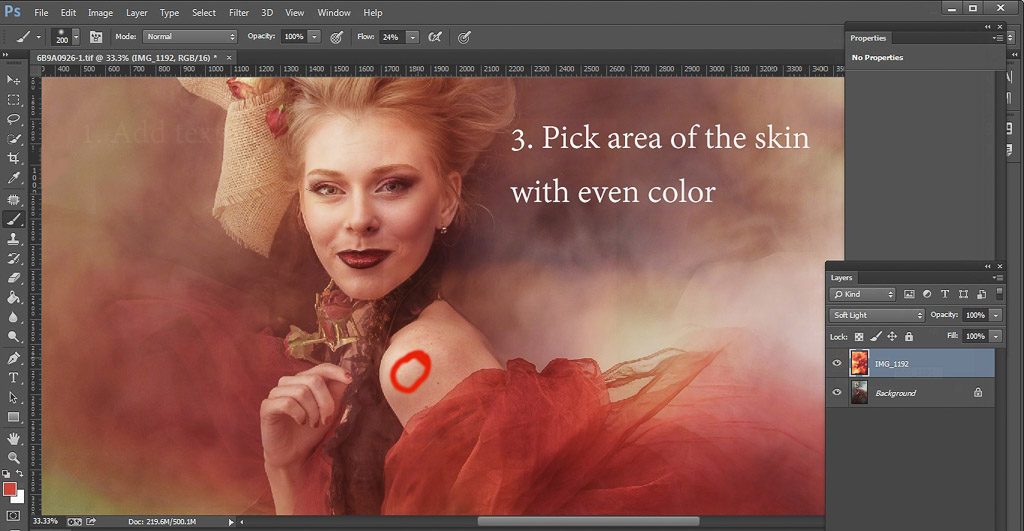
inspect the image, pick tonality you like, remember the spot.
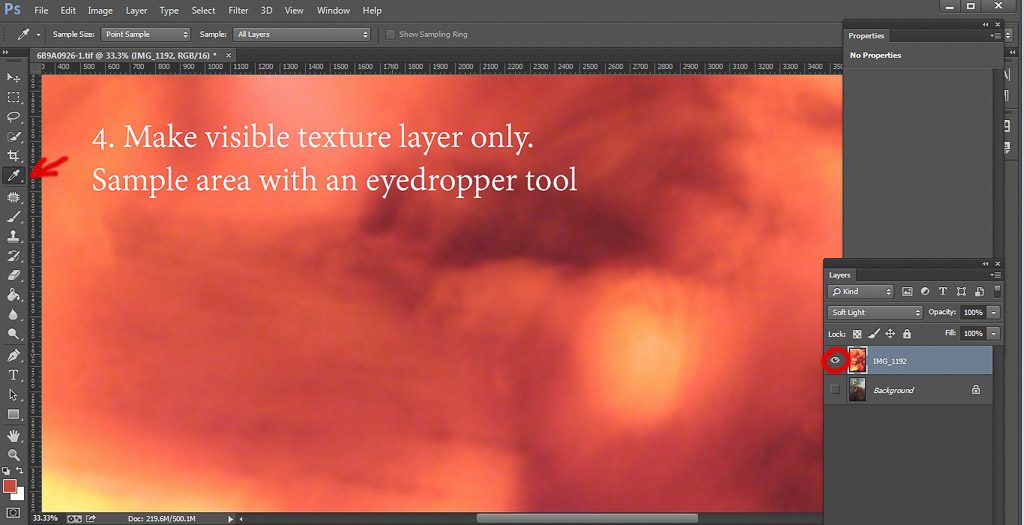
If all layers will be visible, your Eyedropper with sample combined color, and we don’t want that. We need only color from the texture itself.
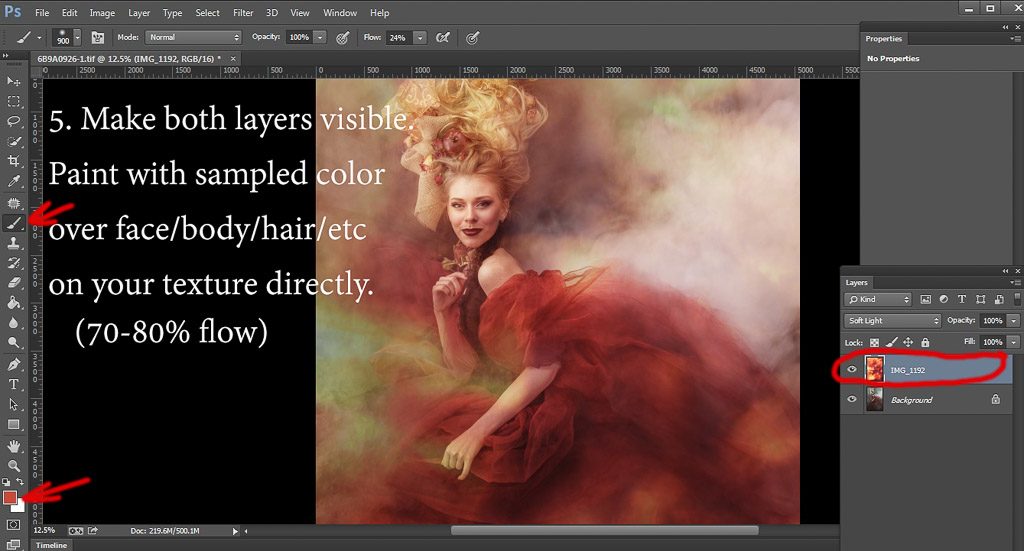
Paint directly on your texture layer. It is that simple. Check out uneven color on her hand – indeed we need to even out tone!
One tip – if you want skin color to be less saturated and lighter/darker, pick color to the left and higher for lighter, and lower for darker.
Play with it. Just stay within same hue.
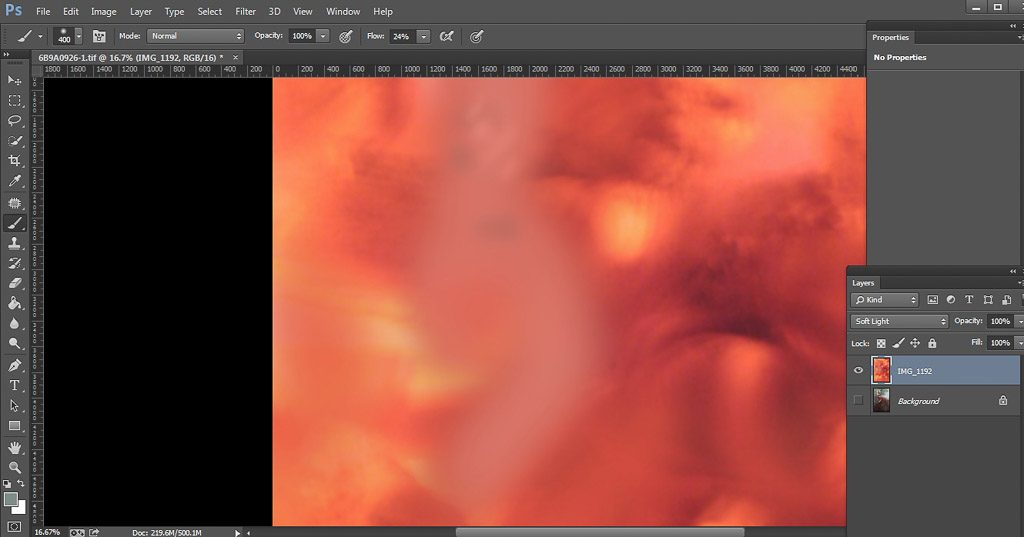
This is how my texture looks now. See – I painted directly on it.
And done!
Questions? Comments? Stay in touch!
Nice, simple and clean technique.Thank you for sharing, I may have to steal this sometime 🙂
Be my guest 🙂 I’m thrilled I can share something useful. Thank you for feedback!
Your tutorial is surprisingly simple! I love your work. Thank you!
Thank you so much for feedback!
Thank you so much for taking the time to do this I really appreciate it. I’m really looking forward to trying this. Your images are so beautiful thank you for sharing them and your knowledge.
I love this! I have a lot of textures I have been collecting, but not the photoshop capacities. Taking PS and learning more and more.
Thank you for your sharing…….I really appreciate it,your work is simply astounding.
Thank you so much! Glad you’ll try it!
Thanks! Can’t wait to try it!
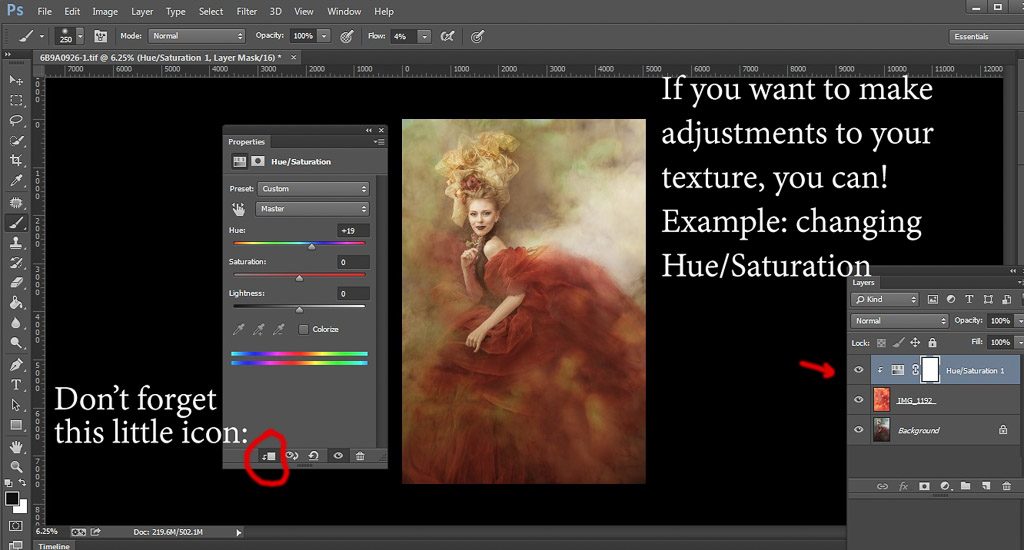
hi there I love this thankyou so much for sharing, but the problem is when I add the texture and then go to hue saturation, they are not showing up , maybe im doing something wrong
Hi Sharon, what does not show up – Hue/Saturation or changes in the texture?
Would love to see behind the scenes setup for that shot. Was it done in a bathtub or outdoors in a body of water?
It was shot with use of dry ice
Thanks so much for taking the time to share in detail! I love your work!
It is a bit unclear to me, though, at the Color texture from step 3 on. You sample from her, say, shoulder for even skin, then you sample again from the texture layer… Am I missing something in between? You are painting on the texture layer with which one?
Many thanks!!
<3
In step 3 you are not sampling, only choosing the area (no actions, just visual observation), and from chosen spot you are sampling in step 4. Does it make sense?
Yes, it does. Thanks so much, Tatiana. 🙂
Hi Tatiana, Beautiful work! Thank you for sharing this process. I’m going to bookmark it and hope to try it sometime. I don’t have a library of my own textures, but need to start.