Frequency Separation tutorial… making a doll ;)
I’m about to share with you my favorite editing technique – Frequency Separation (FS). Essentially there are 2 major ways: with Apply Image or High Pass filter.
Any High Pass filter setup would work for what I show here. Use your action or mine. It can be downloaded here.
If you’re not familiar with what FS is, please check Julia Kuzmenko’s post on the subject, it’s the most comprehensive I’ve seen so far.
In short – it is separation of the image into 2 parts – one is texture/fine details, another is tone/color transitions. Why? To exercise control issues 😉
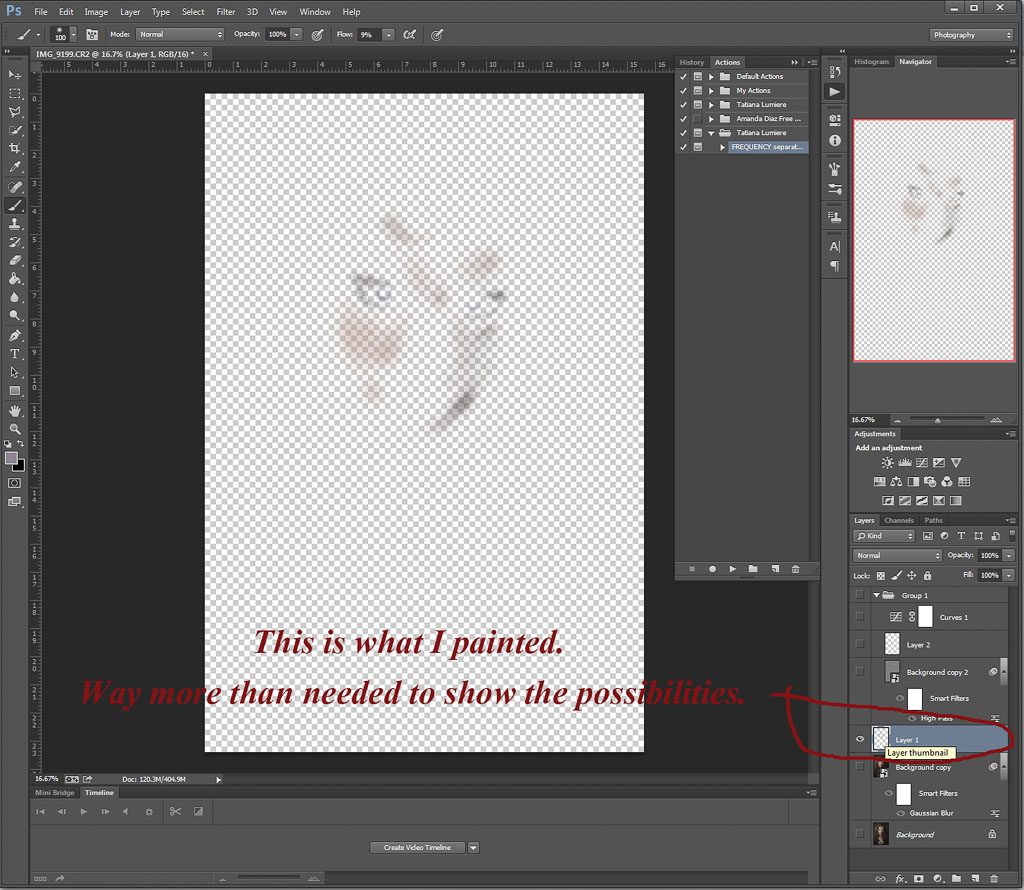
In this tutorial I’ll do a lot of unnecessary things to show possibilities of FS. Don’t try it on a portrait of a friend who does not have a sense of humor and stronger than you are 😉
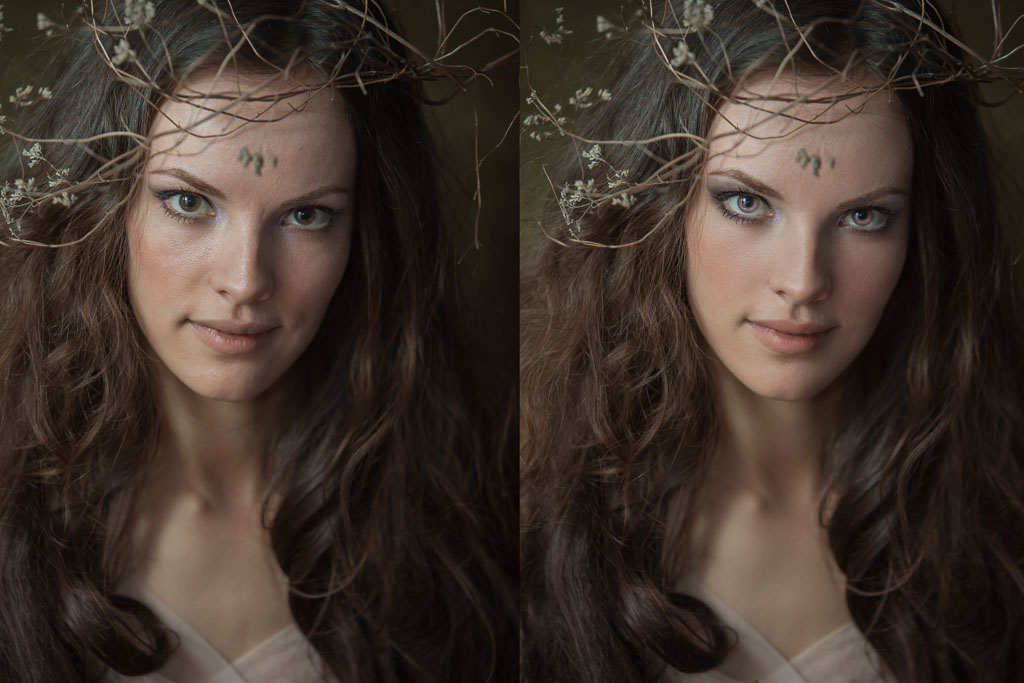
So here we go transforming my beautiful friend into a doll-like creature.
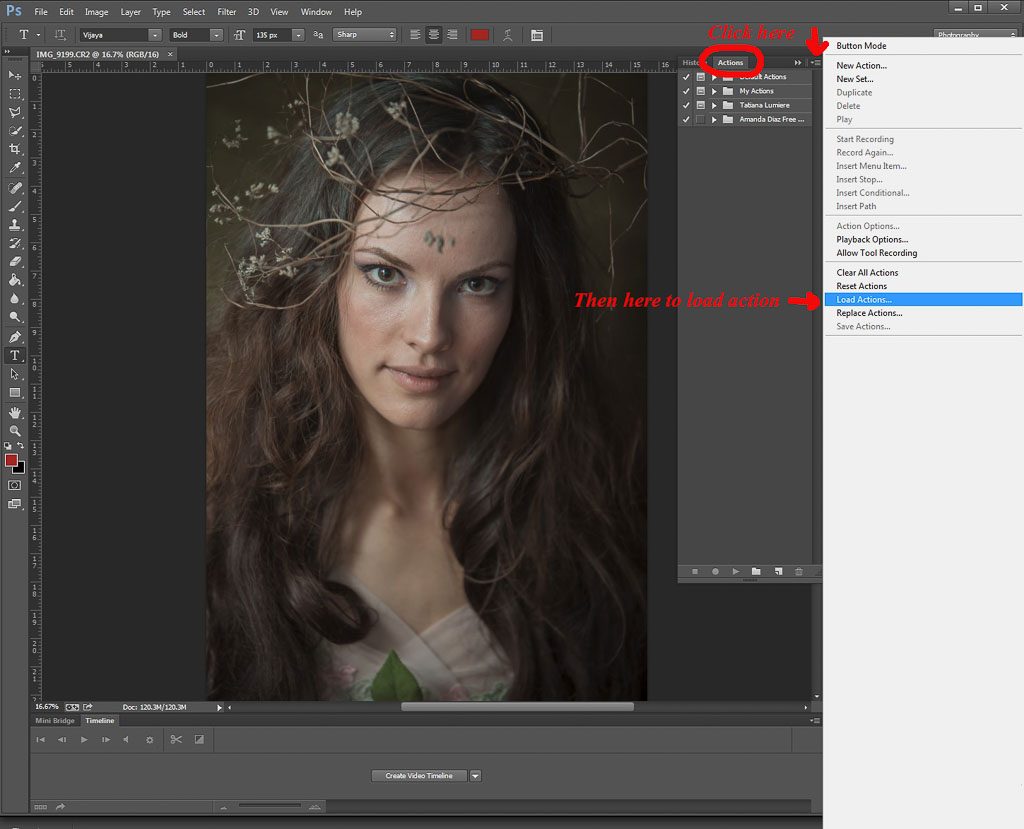
If you’ve downloaded my action, you’ll need to put it with the rest of your actions. Click on “Load Actions” and navigate to downloaded folder.
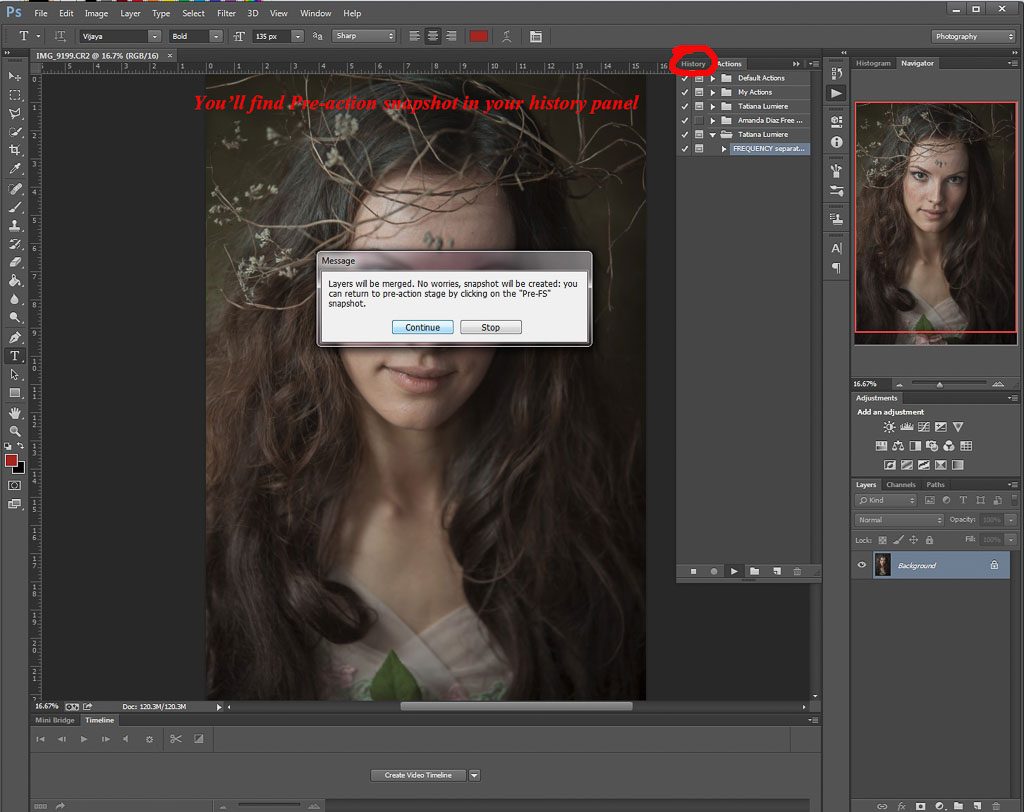
Select the action, click on Play button in your action panel. Whatever layers you have will be merged, snapshot will be created. No worries.
Ooops. Nothing happens, same image! Mine is broken!
Just joking 😉 This is it – the action just decomposes image into frequencies. The magic is inside. And we’ll go over basic things only in this tutorial. There is so much more to it!
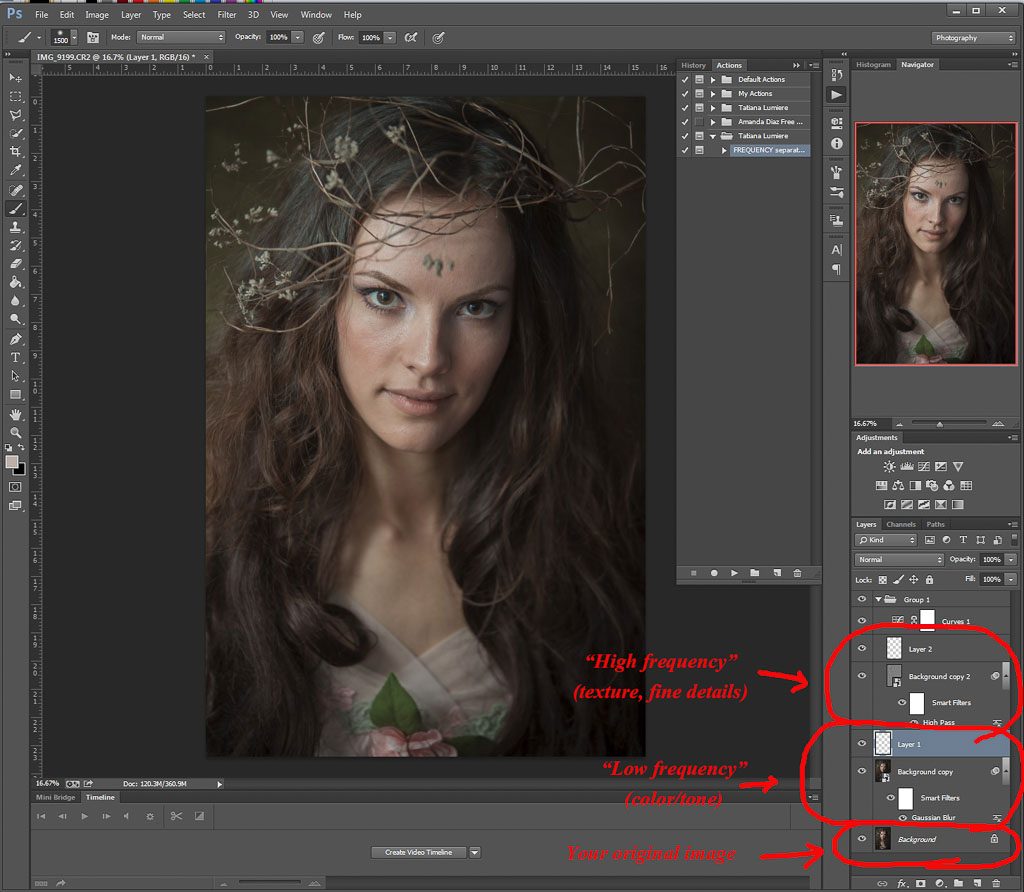
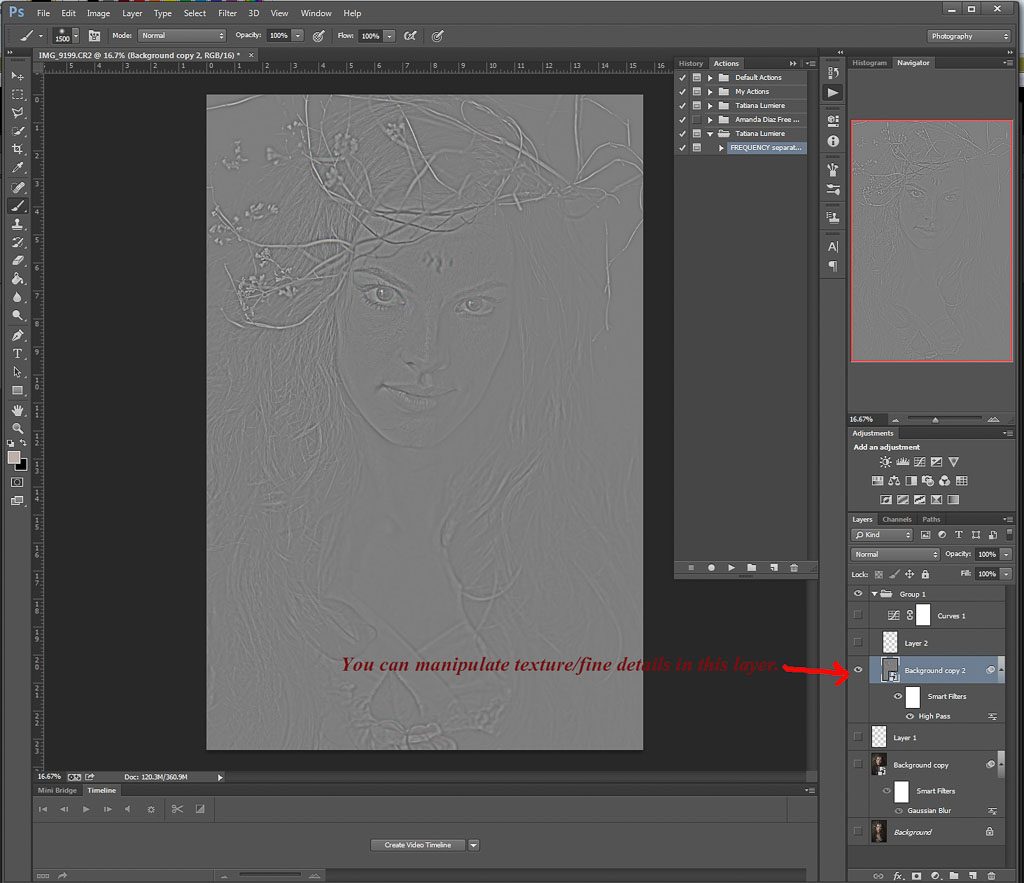
This is our “High” frequency
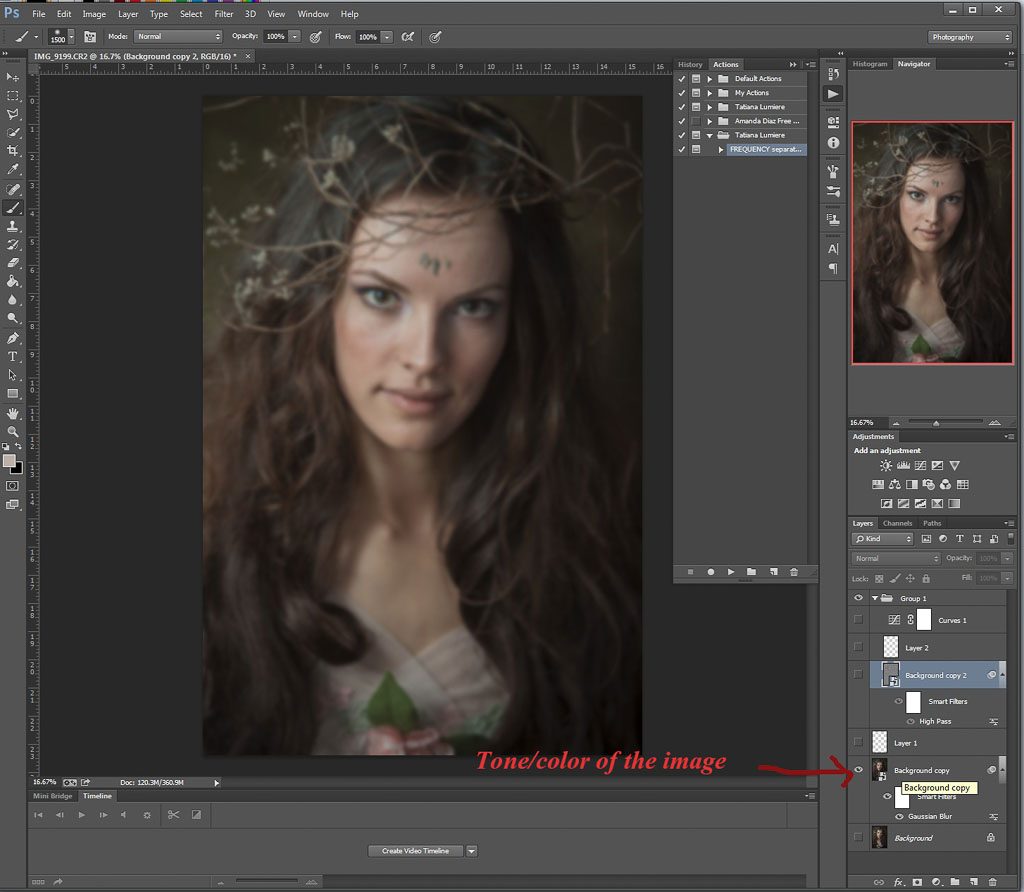
…And “Low”
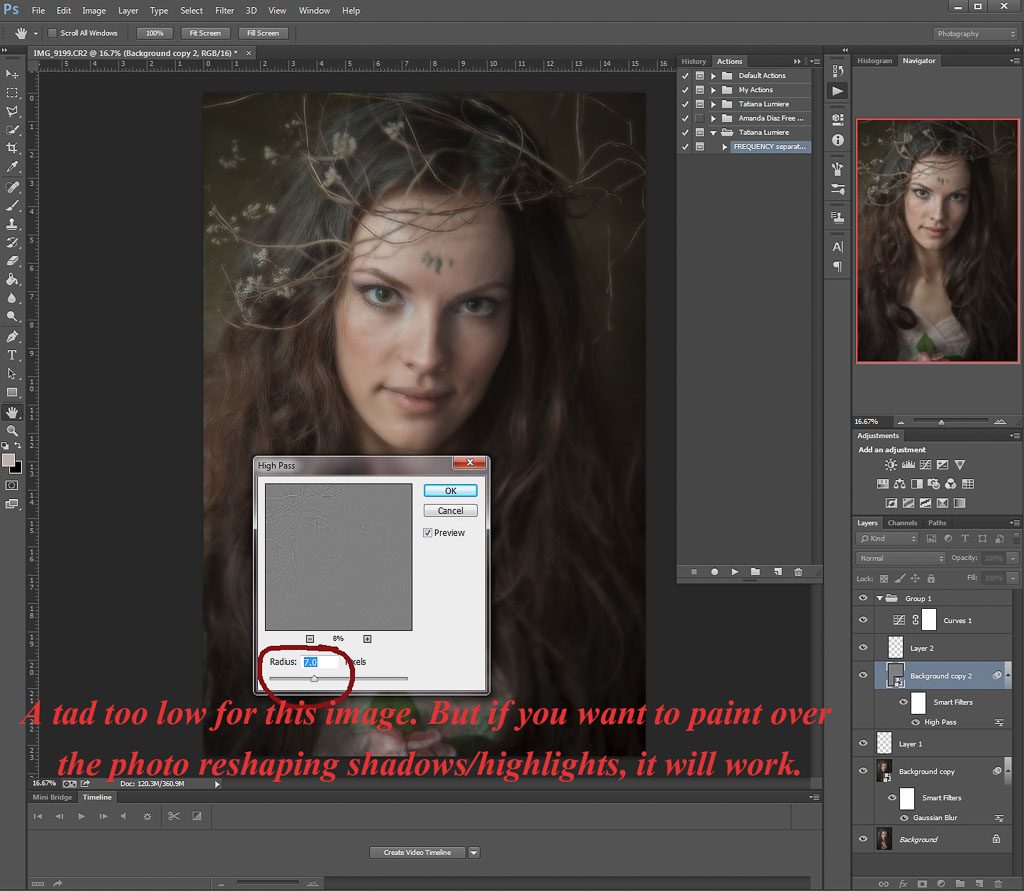
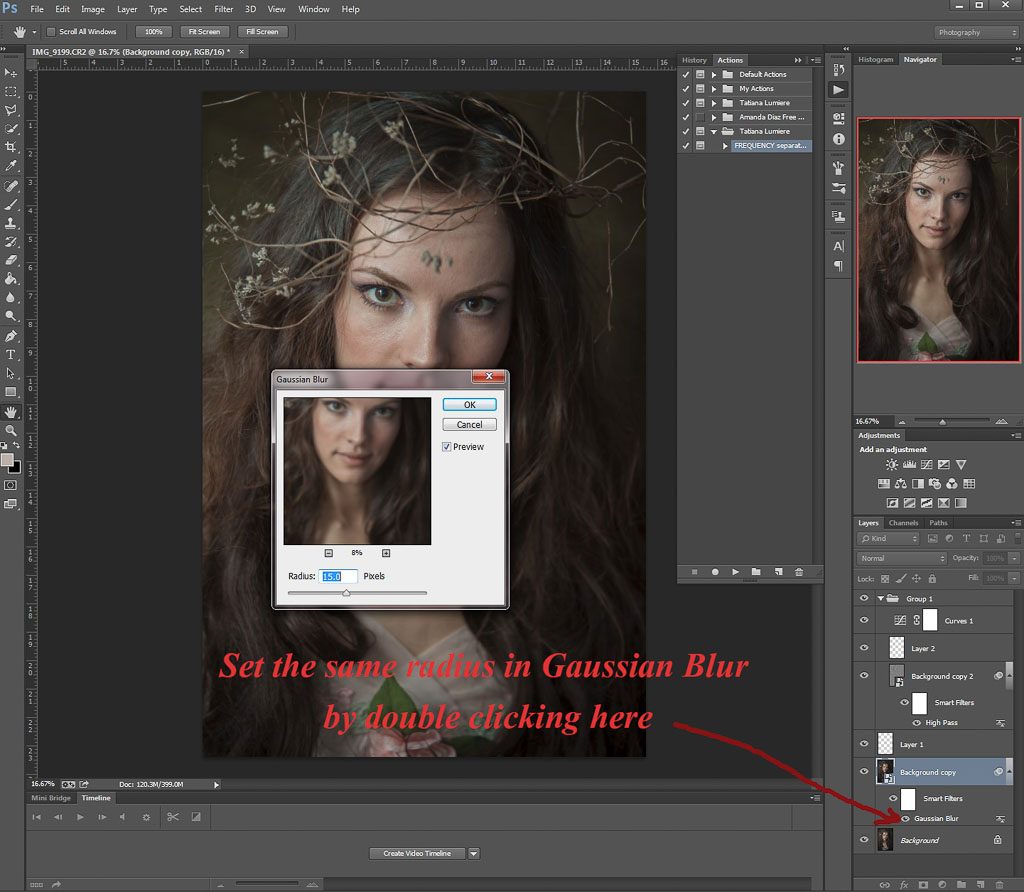
We need to choose the radius. Different images and different editing needs require different radius. (3 times “different”, I know).
50 is way too high for this image – color transitions moved to “High” frequency.

7 is a bit too low – texture info partially goes into “Low” frequency.
15 seems about right. For basic editing needs both High and Low needs to be the same radius.
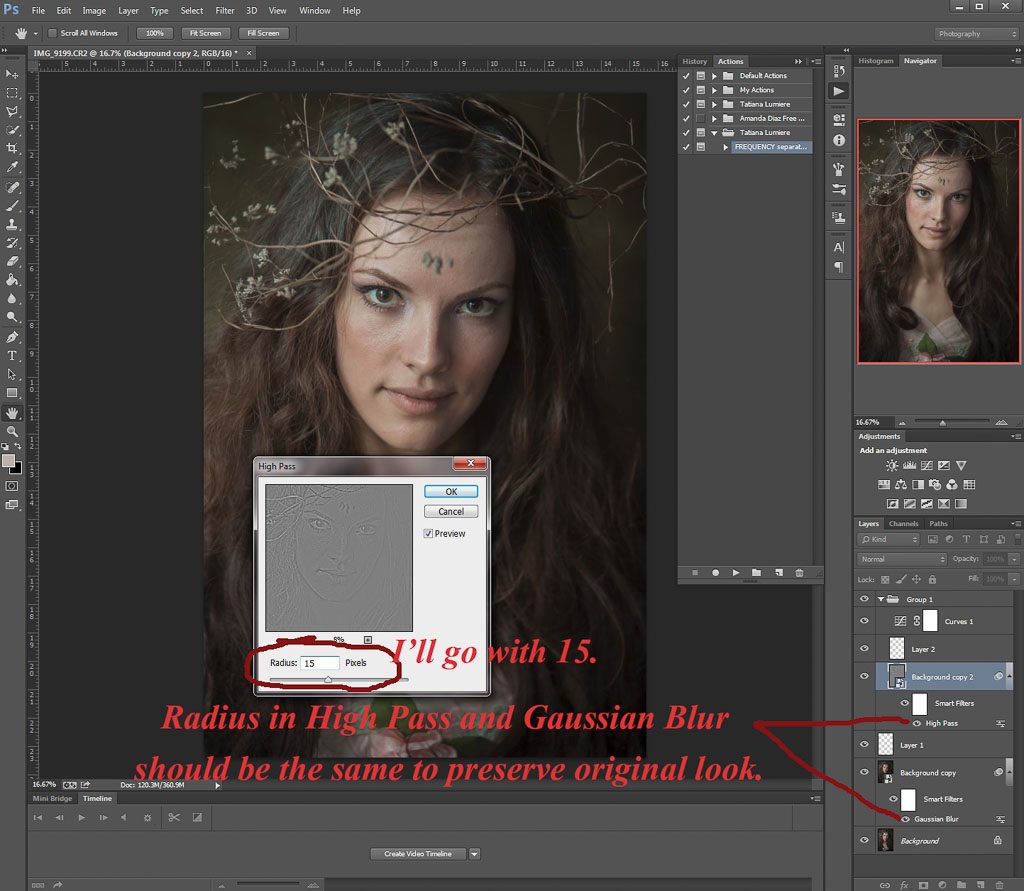
Double click Gaussian Blur layer to set the same radius.
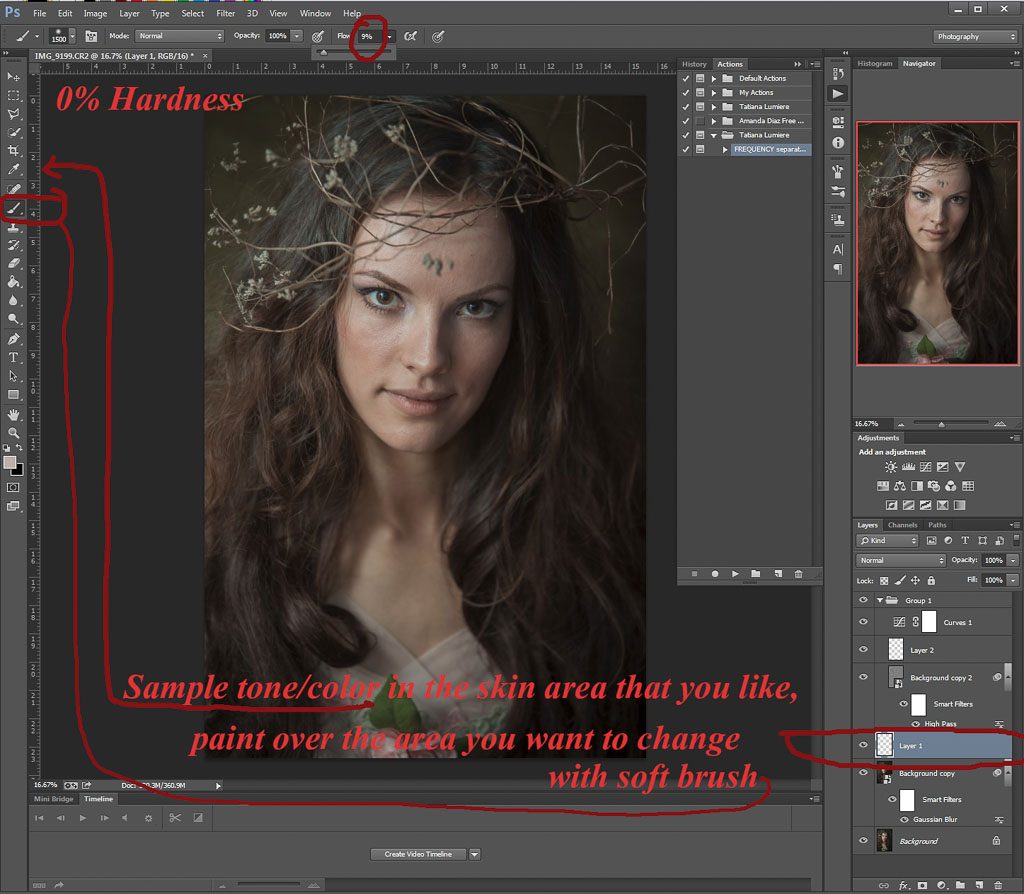
Now let the fun begin. On this empty layer below High Pass we’re going to paint. Flow can be set even lower than 9%, the less the better in editing. Use very soft brush, sample areas that you like to use to paint over areas that you want to alter.
I’ll go crazy, and will not only do the skin tone, but also add make-up and change color of the eyes.
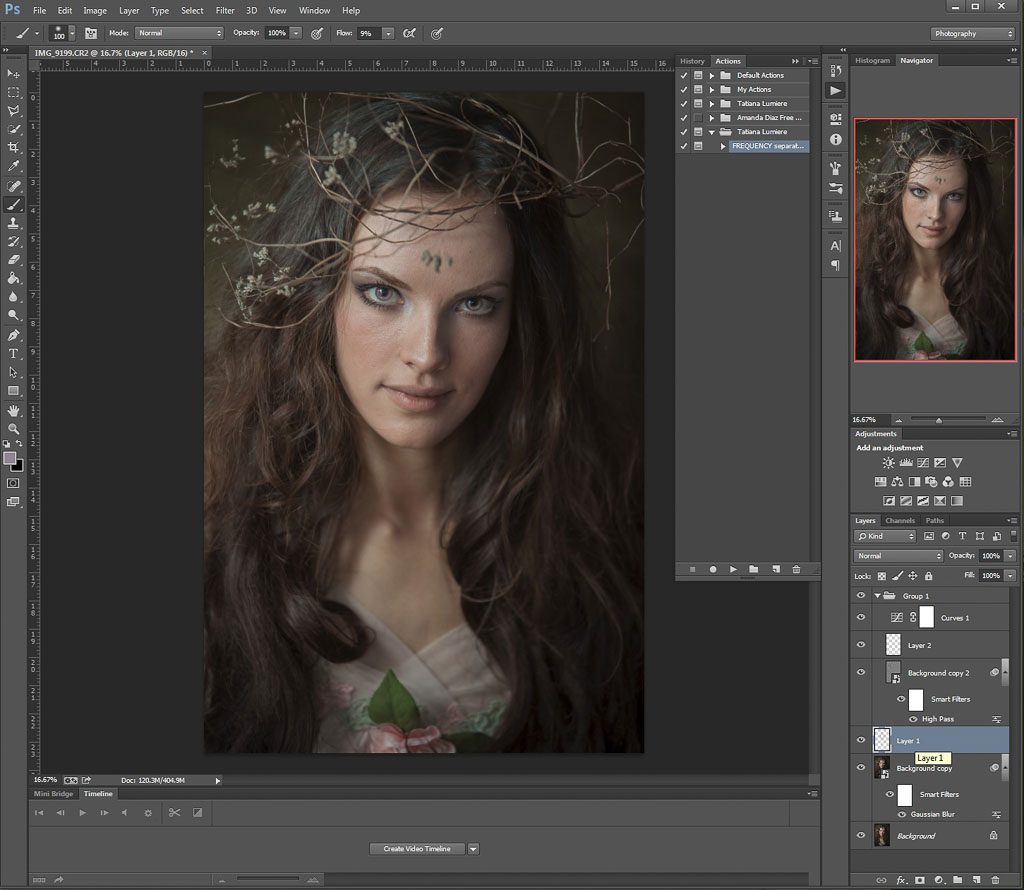
Neat, huh?
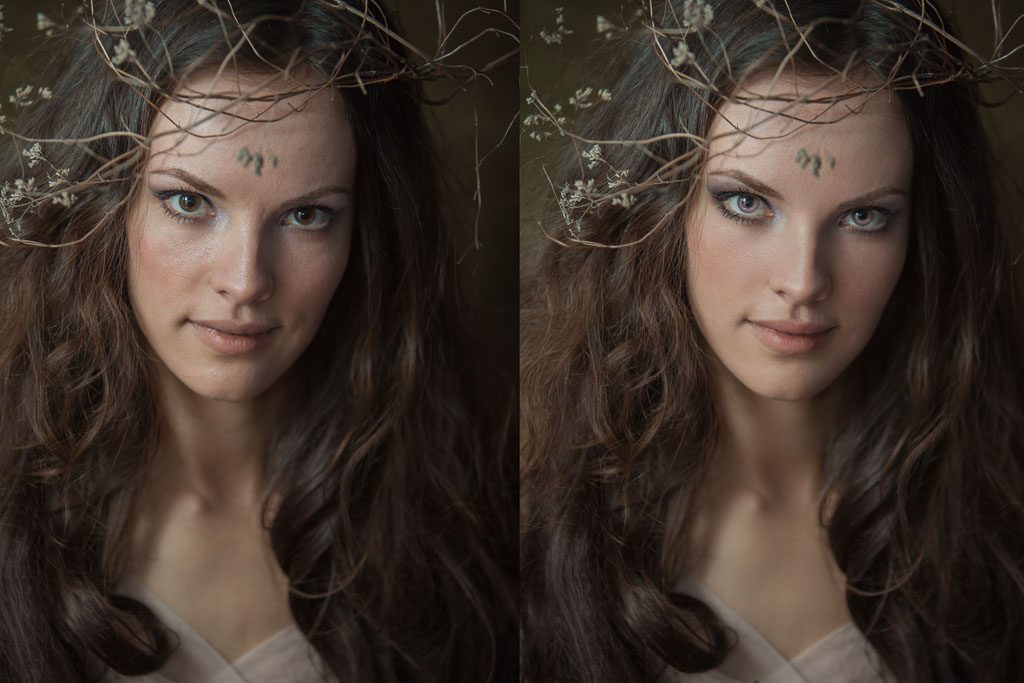
The result 😉
It’s okay to stop here. However if you want to play with texture: rasterize the High Pass layer.
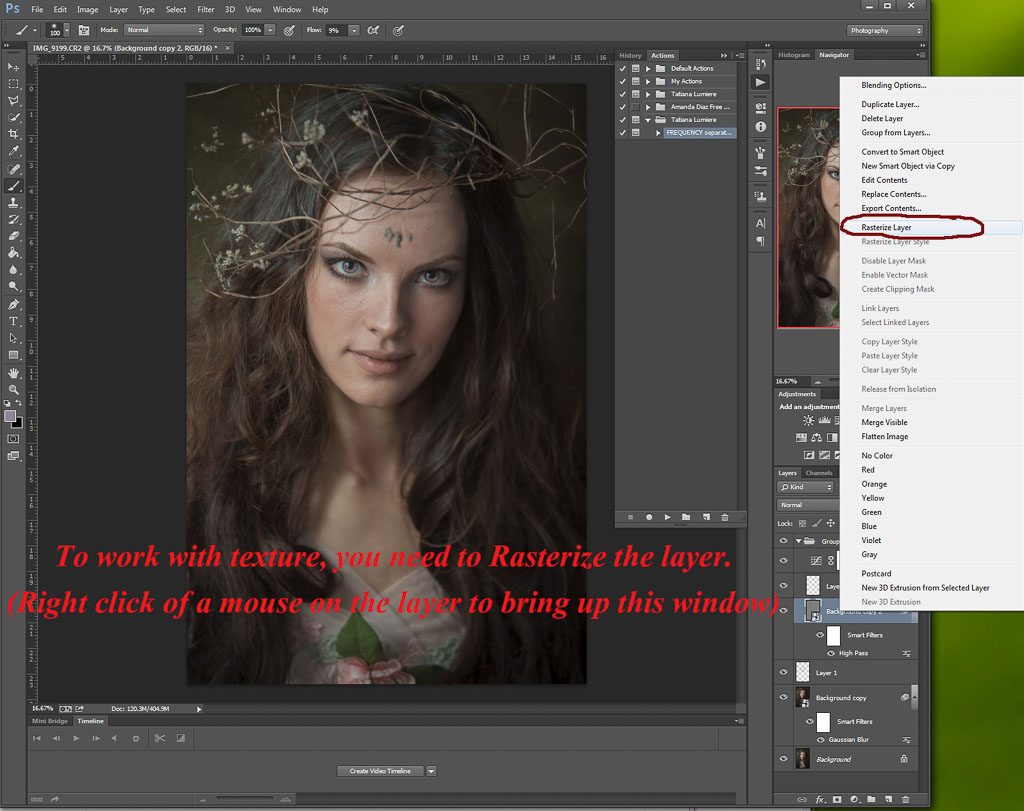
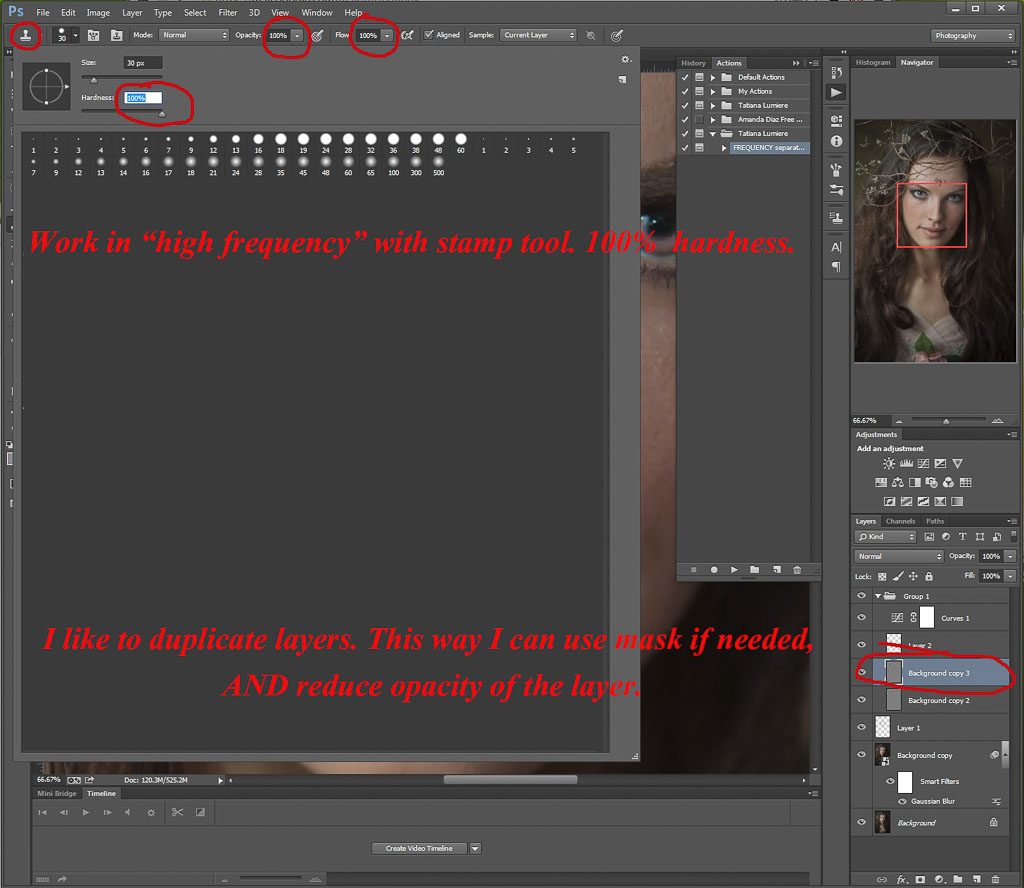
I duplicate all layers I’m working with to make any mistakes reversible.
Use stamp tool (100% hardness – this is important, you don’t want to change texture look by using soft settings). Sample areas you like, clone to where you think it’s needed.
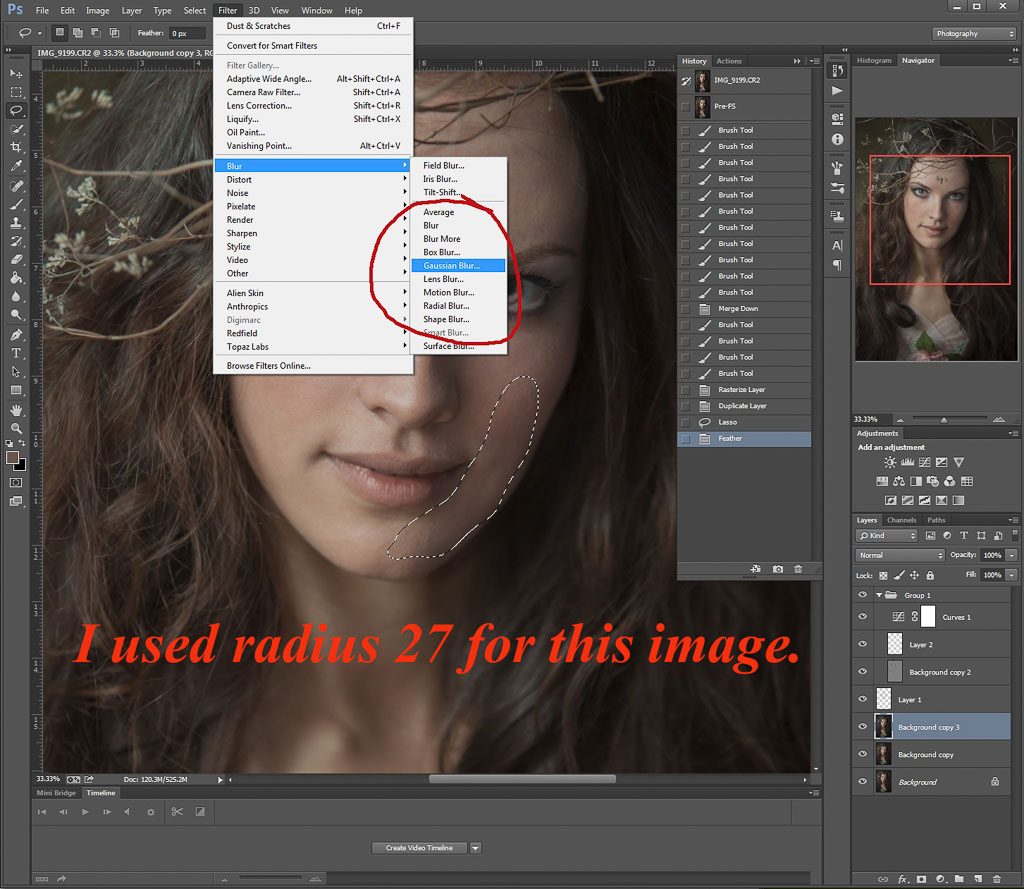
You can also alter color transitions by working in the Low. Rasterize Gaussian Blur layer first.
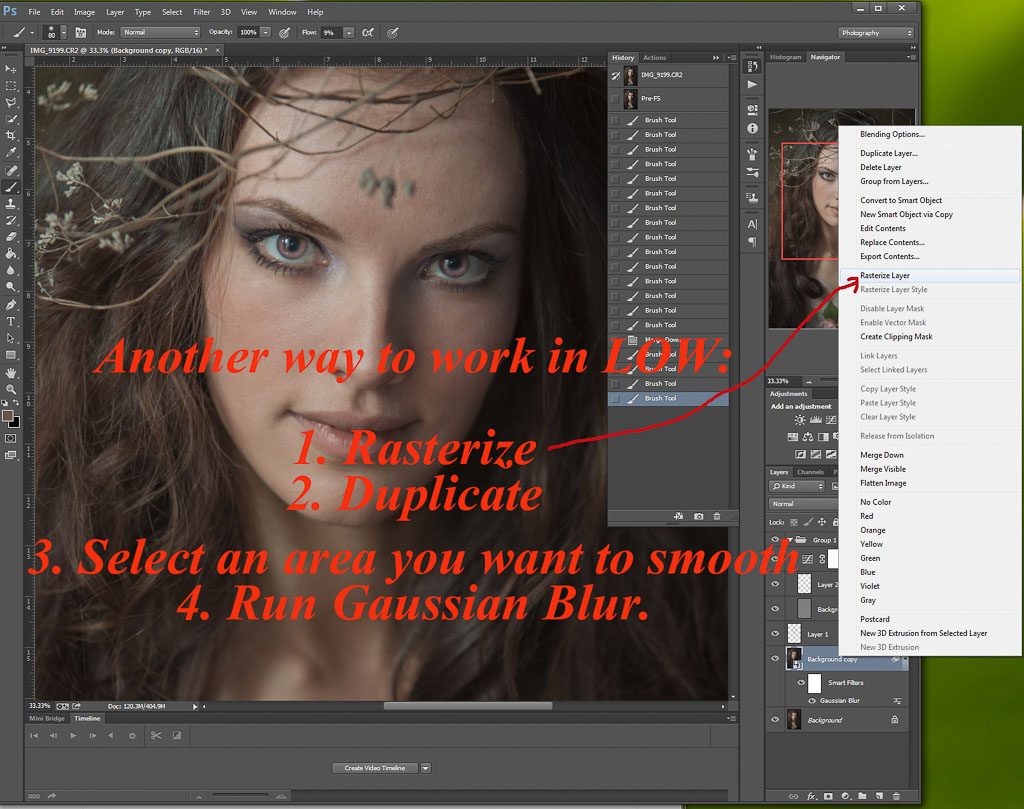
There is a reason why we’re not running Gaussian Blur over the entire image. Better to make several selections of areas without huge tonal differences (don’t do hair and skin in one selection).
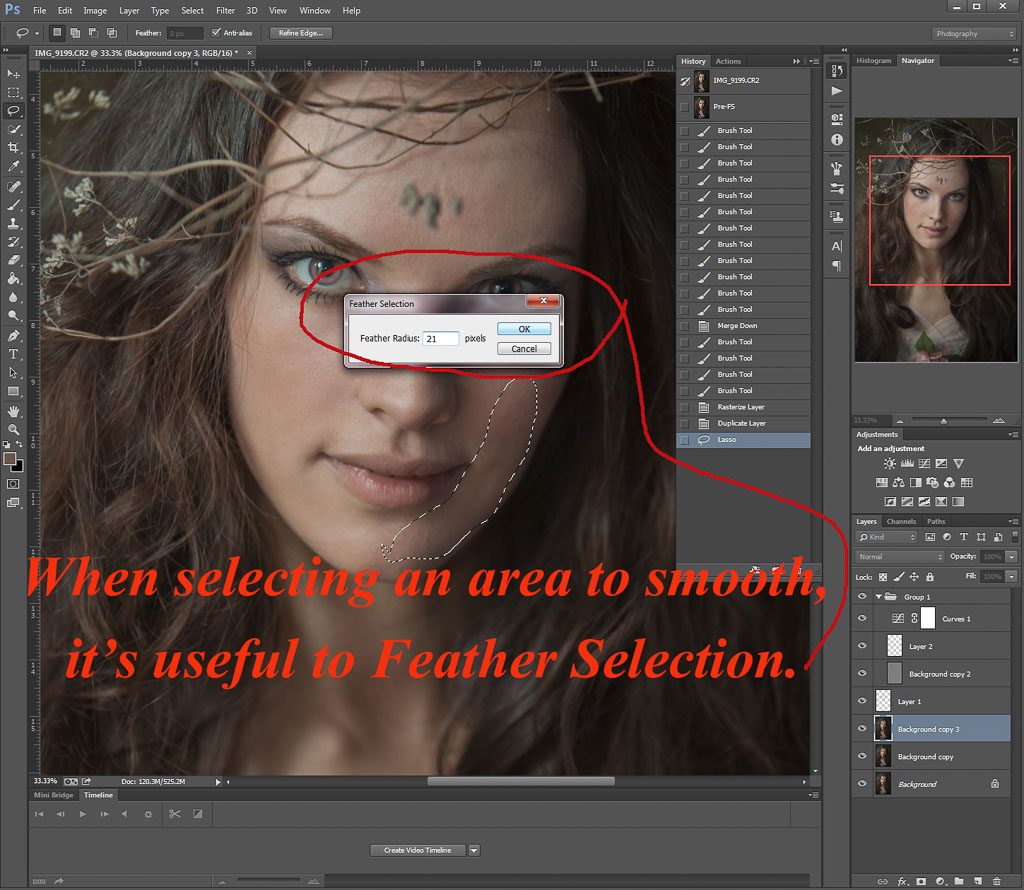
Play with radius for your image, you’ll see how smooth the area can get in the preview.
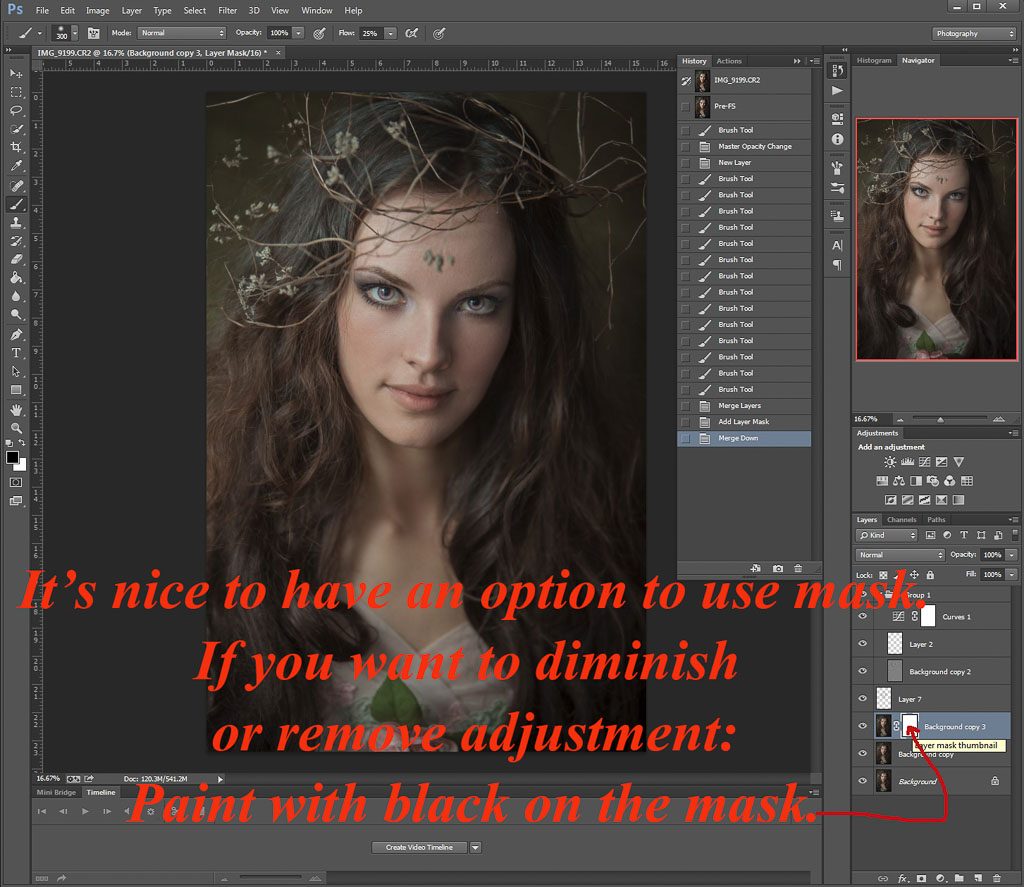
If you want to make corrections to your adjustments, use masks! Use brush with black to hide and white to show.
Before calling it a day, I like to merge all but Background layer to see if I did too much. (I know I know lol)

Crazy, huh? 🙂
I tried to be as meticulous as I can be. However there is always room for improvement. Something unclear? Got a question? Shoot!
Tatiana this is great! This will save a lot of time and it’s explained very well. Can’t wait to see what you do next!
Thank you Tom!
Thank you for this write up, Tatiana! Very helpful.
I rarely use actions, but this one is amazing! Very well done. Love the detail involved and that it’s not a “quick fix”.